Showing posts with label plumbing. Show all posts

Saturday, April 9, 2011

Knocker


Our friend (and frequent blog commenter) Wendy sent us this great door knocker a few months ago. It took us a while to get the time to install it, but here it is. As beekeepers it's perfect. We are also seeing the bees out with the recent spring days, so the timing seems right. It's also just kinda fun and not too serious. Thanks Wendy!

I've been at work tidying up lingering items such as the rest of the track lighting in the kitchen, repairing a leaky water line to the garden stand pipe, building an integrated shelf and grow-light unit for a spring seedlings in the big living room window.

Tuesday, March 22, 2011

Door Knobs

A brass and porcelain combination in the upstairs bathroom door

A brass assembly in the first floor bath door

The latch mechanism. I buffed out the rust, put in some grease and put it back together. It works great


Mortising out the opening for the mechanism

Last weekend Nancy, our friend John, and myself went antiquing and among the items we came across were some nice antique door knobs. I've been holding off on drilling the holes in the bathroom doors until we decided on the knobs and mechanisms because old mechanisms are a different size then modern ones.

I mortised out the space for the barrels and then fit the knobs. The porcelain set we've installed in the second floor bathroom door came with a connecting rod that was just a little too long. Faced with this I called up Felton next door and asked if he might have any of these common, but old-style, connector rods. Lo and behold he did.

It delights me that some old door knobs from who knows where are now an integrated and useful part of our home and will be for years and years to come. In part with this is that rod that's been sitting in a coffee can of Felton's for years, maybe decades, and is now found a new life in our house. So cool.

Otherwise, I've fixed up some plumbing issues that were needing attention and wiring up light fixtures.

Saturday, March 5, 2011

Lights and a Cape Cod Sink

New-old sink in the first floor bath

Another view

Building a lamp fixture

A light hanging over the dining room table from track. We have a vision of a series of small lights hanging here at different heights

Disassembled exterior fixture about to be painted black. This was mounted on the the old garage and will now serve as the fixture that lights the walk route into the house

I've been working on installing track where we'll have track lighting in the kitchen and dining area. This required a little sheetrock work again; cutting strategic points to wire or re-wire to make what we need to have happen. In the case of the kitchen track lighting we decided to make the track tw0-circuit so that we could have some or all of the lights on depending on which circuit they are fixed in. This allows, say, the light over the sink to be on it's own circuit and switch from the rest of the lights that light the counters. I'm always a little hesitant to cut into the sheetrock, but usually it goes pretty smoothly and I'm mudding it back up in short order.

I've built up a couple of lamps and they look just fine. One is hanging over the kitchen table, the other is over the kitchen sink. More to come.

Remember that big old sink we had in the downstairs bathroom? Well, it has moved down closer to it's final home in the basement. In it's place we've finally installed the sink that Nancy's parents Lee and Lou brought to us last fall. It's a great old marble sink that used to be in the bathroom at their house on the Cape. Its kinda battered and stained, but it's got a good measure of beausage (pronounced like "sausage", as in beauty-through-useage) and looks quite handsome in out bathroom. We're planning on replacing the faucet controls because they are kinda beat up and sorta unattractive. Eventually we'll build a cabinet that the will replace the brackets that the marble sits on right now.

One more piece of the puzzle in place.

Saturday, December 4, 2010

Installation to Relaxation


I made a push last week to have the tub installed for the weekend and it happened. Most of the effort was in the multiple coats of primer and then paint on the beadboard before the tub could be placed. The actual installation involved a bunch of plumbing prep and stuff that I had I known way back would have been a bit easier. I'll know for next time.

In any event, late last evening a major emotional and functional moment was reached as I turned on the tap and climbed in. For seven and a half years we've trekked down to my parent's place for baths and showers, which has been really nice to be able to do; it seems that chapter ended with a successful check for leaks and grabbing a towel and some soap.

This is a moment we've been waiting for for a long time!

Monday, October 25, 2010

Window work

Joe putting together another window unit

My cut plan for the cabinetry so I know how much plywood I'll need

Two horizontal strips cut out of the sheetrock in second floor bathroom. I'll be installing strapping pieces in there as an attachment point for the vertical bead board

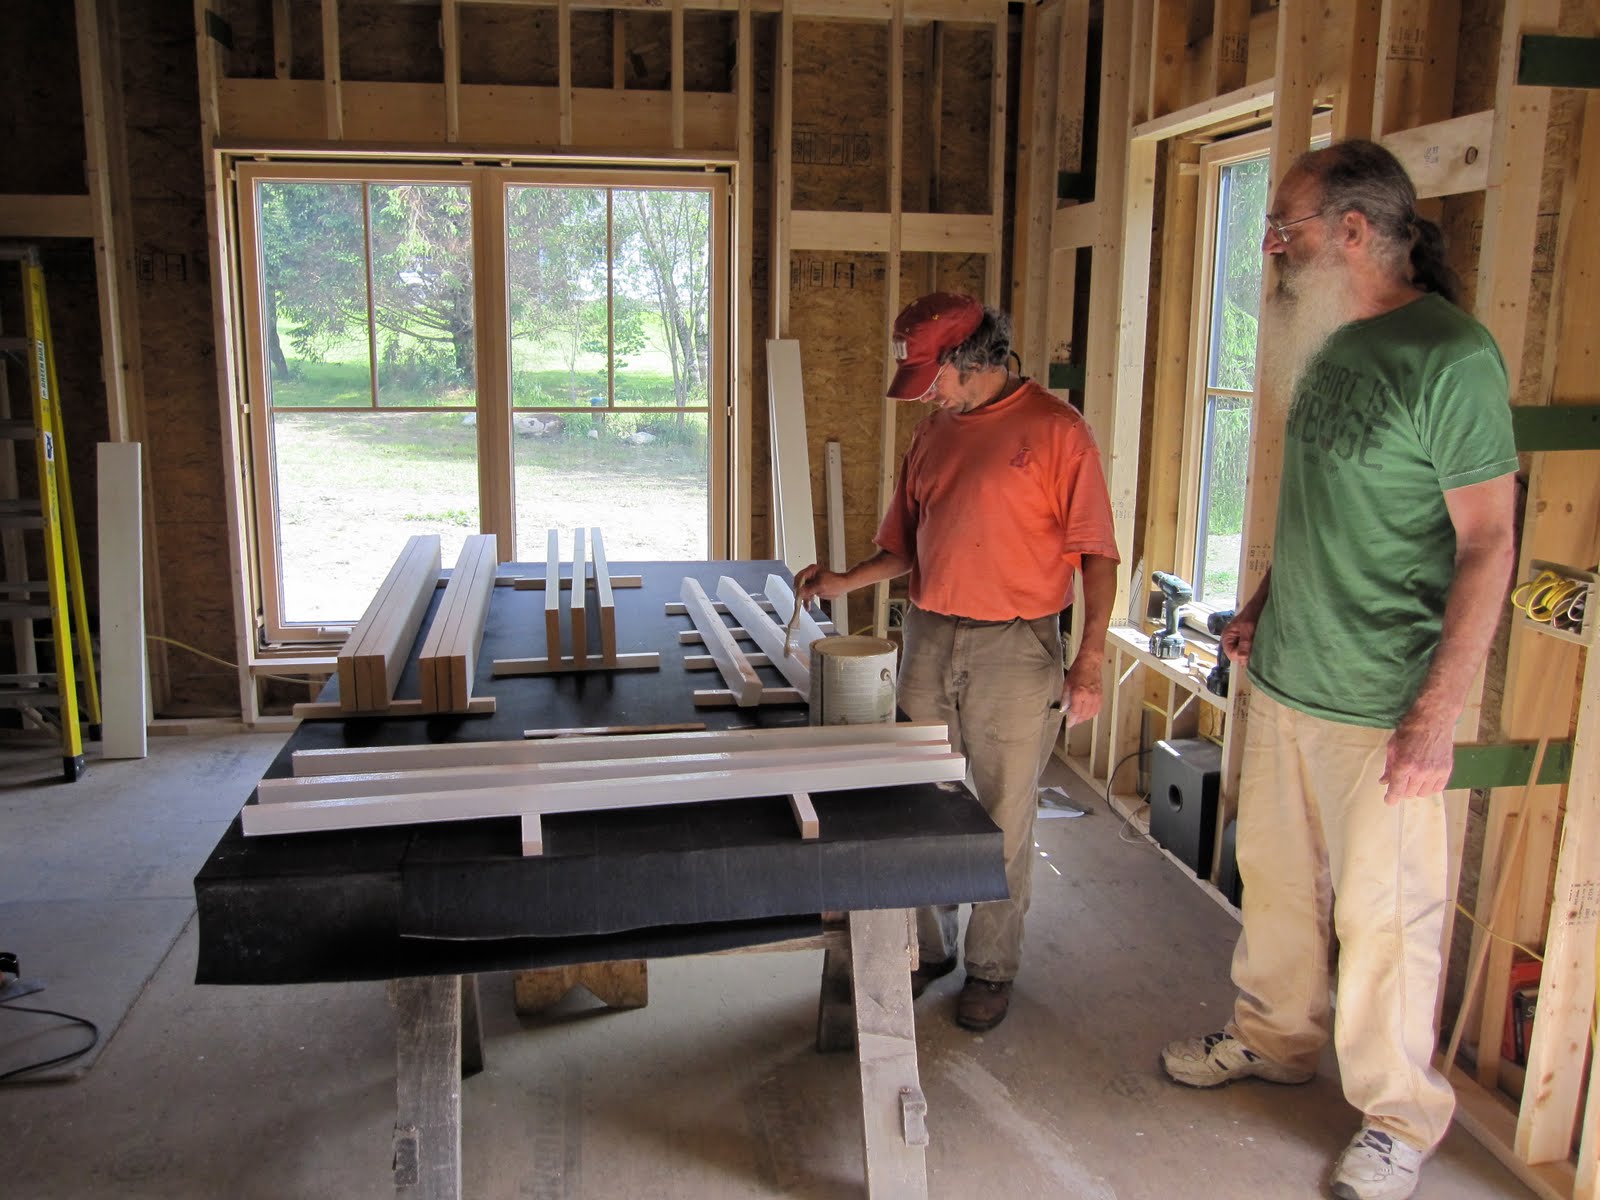
Joe is steadily building out all the window sill, returns, and trim. Each window is a project in its self, but he's got it worked out to a system and is churning through the project really nicely. In essence each window unit gets a box-like unit consisting of the window sill, the side returns (think of them as the walls that go from the sheetrock surface to the window) and the top return (the roof) that when assembled, slides into the rough opening and gets shimmed and screwed into place. Once the box is in, the trim goes on around the perimeter and the window is complete. It sounds straightforward, but there's a lot of planing, sanding, edging, trimming, fitting and beveling that happens to make come out just right.

I'm making headway on the kitchen cabinet project although so far most of that progress is on paper, but today I finished off with a materials list for the first phase of the project, which will consist of the guts of the cabinets; the base and plywood walls that will be eventually hidden by the face frame and doors. Like the house its self, you start with the foundation, then move on to framing, and finally finish with the fancier parts. Its going to be fun to actually start building them.

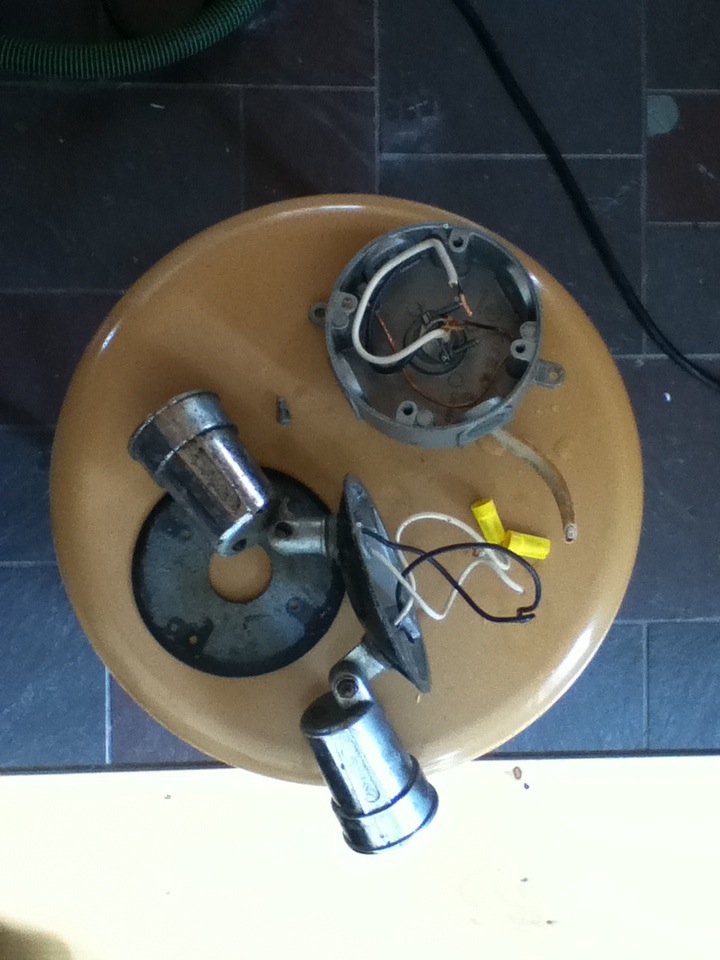
Otherwise, I ordered the necessary plumbing parts for the clawfoot tub, some lamp parts so I can start experimenting building light fixtures and I completed a tile plan for the first floor bathroom. Oh yeah, over the weekend I also cut into the sheetrock in the second floor bathroom to allow for horizontal strapping onto which we'll afix bead board. It would have been easier to have just laid the sheetrock out like it is now rather then having to go back and cut it, but that's how it goes.

Thursday, September 23, 2010

Home and Garden

Grading around the house

This is the water line coming through the basement wall running out the water supply in the garden

Nancy working with Scott to move the shed. We used 3" pvc pipe as rollers

Our new water supply in the garden, right near the compost pile

We've turned our attention to completing the site work and grading around the house--finally. For months I've been anticipating filling in all the hollowed out areas and leveling out the rough stuff and having real topsoil rather then hard clay for a lawn.

This work started off two evenings ago by moving our shed for the second time. We moved it back in the spring sometime and felt like that was a good decision, but have since decided to move it again to allow for easier parking. Our pal Scott from down the road came to our rescue with his Kubota tractor and pulled the shed to its new home between ourselves and our uphill neighbor. We need to tweak it, but its a good move.

This morning Mac -- excavator extraordinaire -- showed up to do complete the site work. The first project was digging a trench from the house to the garden so we could lay in a water line for a standpipe water supply in our garden. This went pretty smoothly and he spent the rest of the day clearing up the general area around the parking, the west wall and also took out the massive stump that was right near the yurt. Things are looking pretty slick.

Saturday, July 24, 2010

Signs of Domesticity


Nance and I are taking care of two neices and a nephew this weekend and in preparation spent a whirlwind afternoon on Thursday cleaning up, child proofing, and making things comfortable for our first-ever house guests.

Remember that tar paper that we put down to protect the floor of the second floor guest room? No? Well you can see it here when it was first put down; after about nine months we finally pulled it up and the floor looks great.

We also decided to install a rough-and-ready sink so we could do some dishes and whatever other sort of washing we needed to do while the kids were here. The sink is an old farmhouse sink that came out of the old farmhouse that my sister and family live in. Its a great sink and we'd be open to keeping it as our permanant sink but its kinda low between the faucet and drain and there are no dividing bays.

Sunday, July 4, 2010

Preping for for solar hot water

There is now a second pipe through the left-side roof close to the ridge allowing for the solar lines to connect to the panel which will be mounted on the other side of the roof (the sunny side)

Looking up through the pipe

The flexible lines in place before we put the pipe through

Its come a little late in the process but we have determined that we can and will be installing a solar hot water panel on the roof.

In order to be prepared for this we needed to put another hole through the roof to allow passage of the supply and return copper lines to go from inside the house out to the panel mounted on the roof.

The lines pass down from the roof through the walls of the 2nd and 1st walls to the basement where we'll eventually connect them to a hot water storage tank.

Tuesday, June 29, 2010

Pre-insulation and other news

Stops in the rafter bays. These are meant to create smaller compartments into which we'll be blowing in the cellulose. The smaller spaces help to avoid settling in a really long uninterrupted bay

Joe installing the fabric stops

Expanding foam installed between the window frame and the framing

Checking to see what sun is available when. The solar hot water panel will be placed at the upper right hand corner of the roof on the right. The key hours for solar activity are between 10:00 and 2:00. We'll be in good shape with this location


Like the first few raindrops before a shower, there is tangible evidence of our being very close to insulating. I've been spending time installing insulating foam around the windows, Joe has been installing fabric stops in the roof framing cavities, I have the cellulose blower on site, and our supplier is due to deliver 450 bales of cellulose on Thursday. Yes, 450.

We are busily checking off the last few items that need to be taken care of before we start sheathing the walls with Insulweb fabric, which is the first step in the insulating process. Its felt like we've been so close to ready for a while but there are seemingly always a few more things needing to be cleared up.

In other news, we have done some research and have now worked out the arrangements such that we'll be able to install a hot-water solar panel on the roof. This will supply hot water to our boiler so that it does not need to heat the otherwise cold water all the way from cold up to hot. With the collector in place there may be times when the boiler does not need to heat the water at all.

We are really excited about this development, thinking it would be something we'd plan for in the future but couldn't do now. Knowing we wanted to do it eventually, I installed the necessary copper lines so we wouldn't have to open up the walls later on. As I was doing this work it seemed like maybe we should just see what it would take to do it now, knowing it would save some headaches later on. One thing led to another and with the Federal credit it looks like its going to work out.

Friday, June 11, 2010

Water!


Today was a milestone.

Thanks to the work of our plumbing contractors, the boiler was installed, providing us with both heat (in the form of radiant heat under the floors) and hot and cold water. We've been waiting a long time for this and it was a moment of joy to witness the cascade of water pouring out of our garden hose hook-up on the side of the house. We now have the potential to hook up any old fixture we want and will be thinking about how we may do that, and when.

Meanwhile, Joe has begun work on the exterior window trim project. He's set up a work station and begun cutting the pieces. It'll be really satisfying to see the outside start to transform from green Zip-system to finish trim and clapboard.

I've been busy wrapping up the seemingly endless details before we begin insulating. I expect we'll get going on it next week.

All in all a good week of progress.

Glass of water anyone? Here, let me get you one.

Tuesday, June 8, 2010

Watershed


Today felt like a bit of a turning point.

I completed some long running plumbing projects, pressure tested the hot water supply lines (they're good), and re-arranged some electrical stuff while Joe continues to make great project on all the pre-insulation blocking work.

I also had a little fun with the water supply configuration. I needed to make another block to keep the upper horizontal copper manifold held off the plywood. Why not make the blocks fish? Of course I got totally excited at the idea and had to do it, and I'm glad I did. I live for that sort of thing.

I also went outside at 12:00pm to see where the sun landed. Unfortunately just as it hit noon the clouds came over. It wasn't for about 10 minutes until it cleared again. In any case, it seems --to my sublime pleasure-- that the sun pretty much lines up with the point of the triangle at noon. What varies is the angle of the sun in an up or down manner depending on the proximity of the solstice or equinox. I couldn't be more pleased about this. Its like an homage to the sun, a recognition of that which is so much greater then everything else we know. It also will stand as a testament to that greatness long after you or I will cease to be, provided the house remains as it is.

On a more earthly note, we have hired a plumbing contractor to install the boiler which will provide the radiant hot water and domestic (drinking and washing) hot water supply. They will also install the pressure tank. This is starting tomorrow morning, so I expect that we will have the availability of running hot and cold water within a week. We've been waiting a long, long time for this.

Friday, May 28, 2010

The week in review


So, Joe was here this week and provided both great work but also a sense that we're getting somewhere with this whole project. I've been doing my thing for a while and it helps to have Joe in on the effort. We made headway.

Joe was working on the second floor, building the headwall that defines where our bed will be and then the closet. So far we like the arrangement and think we'll stick with it.

I've been tying up the loose ends with the water supply. At the point, with one minor exception, all the water lines to all our plumbing fixtures are in. The fun part of this is pressure testing the system. This is sort of like pumping up a bike tire except that the inner tube in this case is all of the water lines running through the house. Like a bike tube, you hook up a air pump and pump up the system to a given level and then look to see if the gauge stays constant. If it does not, there is a leak and you need to go around a dab each fitting connection with some soap-like stuff and see if it bubbles.

We found a leaky connection right off the bat because I'd forgotten to crimp one of the fittings. I crimped it and presto, the system held air. After a couple of hours I went to check again and the pressure had dropped from about 15 psi to 10 or so. I then went around doing the bubble check and eventually found a small leak near the pressure gauge. I re-installed it, checked again and found no bubbles. I re-pressurized the system and will take another look in the morning. This is cool stuff. If the system holds air, it'll hold water.

Window adjusted


The third (and final, I think) version of the window trim. I took the side pieces down by an inch and it looks good. The only other change I might make would be to trim the top piece, but for now this is what we are going to go with.

I am close to being able to pressure test the plumbing supply lines. I hooked up all our various plumbing lines yesterday and labeled them. Blue-cold, red-hot.

Wednesday, April 28, 2010

Water supply lines

Supply lines running up from the manifold
(horizontal copper piece mounted on wall)

The lines come up from below and then make a
90 degree turn to exit what will be the wall

The copper fittings to which the sink will be attached to in the future

Today was spent running water supply lines. These are the lines that bring water to a sink, toilet, shower, washing machine or tub. Blues lines for cold, red lines for hot. In the old days all of this work would have been done with copper tubing and fittings which is both expensive and time consuming, but also requires precise routing of lines, whereas the plastic PEX supply lines are flexible and installed as a continuous line from manifold to fixture. I'm wondering if I might finish off the rest of the lines tomorrow. We'll see.

The view this morning as we received a late April snowstorm

Monday, March 15, 2010

Drain and vent

This is where all the drains come together and leave the house, headed for the septic tank

These are our water supply lines

On Saturday Paul and I pretty much wrapped up the PVC drain/vent plumbing throughout the house.

Next up is running the water supply lines. In the old days, these were the copper pipes that ran through the floors and walls supplying hot and cold water to the house fixtures such as a tub, toilet or sink. These days its much more common to use PEX pipe, which is a flexible plastic tubing. The advantages being cost, ease of installation, material flexibility, high performance, and simplicity when it comes to making connections. In the old days you had to sweat (solder) each joint of copper, these days you just make your connection and crimp it with a special tool that cinches a compression ring.

I've installed the mounting board in the basement where all the hot and cold lines will terminate and tomorrow afternoon Paul and I are going to start running the lines.