Showing posts with label gable end. Show all posts

Tuesday, January 12, 2010

Changes and fixes

This photo shows the original framing removed from over the large living
room windows. The open space was soon filled with a header and new framing


The "real" post that replaces the temporary
one we'd had in place for a few months


This photo shows the framing for a larger window which
will replace the small one currently installed

Over the last week or so, Joe and I have continued building in the secondary walls throughout the house. The work has gone smoothly and as fast or faster then I might have imagined. Usually it is the other way around.

Along the way we've made some fixes and changes as needed. In looking at a reference book I've been using, I noticed a qualifier to something which I hadn't questioned. If you recall, there are no headers over the windows located on the gable-end walls because they are not carrying any load other then the weight of the walls themselves. Well, it turns out that this works just fine, but IF the window or door in question is over 4 feet wide, there should be a header.

D'oh!

I don't think this would have been a big deal, but I was glad to have seen this note when I did because it was easy for us to add headers to the two windows to which this criteria applied.

We installed the permanent post that replaces the temporary one which has been in place since the fall. It's a nice looking post. We might do more decorative work to it at some point, but for now it's just going to do it's job of holding up the second floor at the turn of the stairwell.

Another change was to the window on the second floor. Nancy and I decided on the size and configuration of one particular set of window in haste and once they arrived and we installed them we decided that we'd arrived at something a little too small. So, Joe and I framed out an opening for a larger window which we'll install once I chase down the window company and get our new one on order. It'll be a much more pleasant view and light for the second floor once the new window is in place. It looks out over the garden and we look forward to coffee and tea looking out on fruits of our gardening work.

Saturday, November 14, 2009

Stack Framing


We are employing a technique of framing in building our house called stack framing, which is a little different than how your average home is built in terms of how everything is aligned. The reasons for doing this are: reduced material use, simpler and quicker construction, and improved insulation performance.

In a typical house wall, the studs are spaced 16" on center with a top and bottom plate (plates are the horizontal pieces of wood that connect studs at the top and bottom of a wall). Once the walls are built, a second plate goes on top of the wall to tie things altogether and then the next floor goes on top of that.

What we are doing differently is that our wall studs are spaced at 24" on center, and as we build each successive layer of the house going up, we make sure the framing is lined up with the framing below; we carefully align all the studs so that they are effectively stacked on top of each other going up through the building. The illustration above shows how the studs, the floor joists, and the roof rafters are all lined up in a vertical stack.

There are a number of benefits to doing this. The first is the reduction in lumber. Have framing members every 24" simply reduces the total quantity of lumber to build the house, saving some money. In addition to cost savings, this allows more room for insulation. It also lessens the number of thermal bridges from the outside to the inside of the wall envelope, i.e. less pathways for cold to reach into the wall via the wooden studs.

Think of this:
-In a 28' wall with studs every 16" on center, you'd have 22 studs. The studs are 1 1/2" wide, so if you pushed them all together they'd take up 2'-11" of space in your wall.
-In a 28' wall with studs every 24" on center you'd have 15 studs. Pushed together, they take up 1'-11 1/2".

By spacing our framing this way, we eliminate about a foot of lumber in our 28' wall that would otherwise be taking up valuable insulation space. These quantities really begin to add up when you think of all the walls and roof framing throughout the house. As I mentioned before, stack framing also allows us to eliminate a second top plate, again allowing for less lumber and more insulation.

Related to all this is modular layout. Modular layout means you design your building in dimensions that conform to standard building material sizes. An example would be something like making a wall 8' long rather then, say, 9'-2" because you can then use the full length of a piece of 4'x8' plywood. I made a point of using full 2' dimensions throughout our house plan, and there have be many instances where I noticed how it made our work easier, created less waste, or there is less cutting. This isn't to say that non-standard dimensions are a problem or bad in any way, but they create more work and waste.

The last element related to this is noted in the diagram above, which is leaving out window and door headers on non-load bearing walls. Headers are short beams that cross over any openings in the wall to receive and transfer load down and around the opening. If you think about the downward force of gravity pushing down on the roof, the pressure is transferred from the roof to the kneewalls and then down through the house to the foundation. The gable ends do not carry any of this pressure, so there is no need to put substantial headers over openings when they are located on gable-end walls. The photo below shows various window and door openings as we were building the first floor. The window opening at left is on a gable end wall, so there is no header above it, just a piece of lumber that frames out the top of the window. Moving to the right the two windows in the middle both are located in load bearing walls, so have headers over them. The door on the right is again in a gable end wall, so there is no header here either. This, like the other techniques mentioned above, saves on time in construction and materials located in the wall that would otherwise be insulation.

Thursday, October 15, 2009

Kitchen Roof Complete

The rough sawn 1x6 planks run over the roof overhang.

The Zip system sheathing taped

Joe, testing the laws of gravity.

The kneewall on the east side in place.

View from the driveway

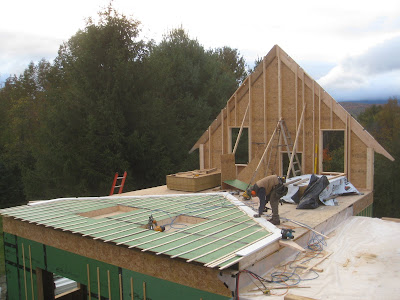
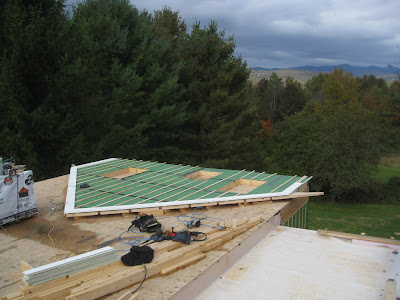
We wrapped up the roof over the kitchen yesterday. In order to create the visual effect of looking up and seeing pieces of rough sawn lumber coming over the end of the building --over the gable wall-- we've had to plan for the intersection of the rough sawn lumber with the Zip system roof sheathing. This worked out pretty well. (The Zip system sheathing is the brown material in the photos).

After the rough sawn lumber was in place we then put up the Zip sheathing. This was one of those times where it feels like you move in slow motion for a day or so and then BAM you go into fast motion and things seem to fly for a while. In a short day Joe and I had the roof sheathed and taped. This means it's watertight and ready for the standing seam roof to be installed. We're storing tools under it now since its dry.

This morning Joe was away closing up his families' camp up in the islands with his brother, which gave me a chance to do a little cleaning up and organizing. I stickered some lumber that needs to dry a bit before being painted, cleared a storage space for our immanent window delivery, and prepped the next round of fly rafter for shaping and painting. In other words, I tried to organize a bit in order to keep things moving smoothly with oncoming work.

Joe showed up in the early afternoon and we continued cleaning and organizing for the next round of work (the roof rafters over the main part of the house). We then laid into completing the remaining kneewalls along the east side of the main part of the house. The weather has been chilly - in the 30's during the day and there's snow all around on the mountain tops. We'll take cold any day over cold and wet.

By the way, I'm pretty wrapped up in this whole process and if any of what I'm describing doesn't make sense, please feel free to write a comment or an email and I'll be happy to try to clarify things. If you want to write a comment, just choose "Name/URL" and enter your name. You don't have to have a URL address.

Monday, October 5, 2009

Kneewalls


My Aunt Ruthie, in Maine, wrote a note asking me to explain what "kneewalls" are, so I did up a little drawing in Sketch-Up to try to make it clear. Basically they are the walls that connect the gable end walls along the sides of the house that the rafters all land on. They support the roof. They can be any height, but are usually fairly low, so I think the term kneewall comes from the fact that they are generally around the height of -you guessed it- your knees. I guess that would make our walls "chestwalls". The lower the kneewall is, the sooner you bump your head into the ceiling as you walk towards it. With our extra thick roof lowering the ceiling, I wanted to maintain a reasonable amount of useful space under the eaves of the roof, so our kneewalls are 4'-6" high.

The orange band in the drawing shows the kneewall along the second floor west wall. The blue bands represent the first and second floors.

Saturday, October 3, 2009

C'est bon


Yesterday, after some delay while affixing the sunburst and surrounding clapboard, we stood up the second gable wall. It was a dramatic moment as the scope of the house really has begun to take form. Event though the rest of the roof still needs to be built, you can now envision the form. As soon as the wall was up we launched into building the kneewall and worked until dusk when it was nearly completed.

Since the first gable wall went up we've been grappling with the height of the house. Having lived in the yurt for many years and only having the low garage to compare to, the house seems quite tall. At first I was nonchalant about this, but after the second wall went up yesterday, something gave and my confidence broke. We spent much of last evening, and some time in the wee hours, anguishing over it and imagining what our course might be. By morning I had devised a means to lift and cut the two gable walls in order to lower the whole second floor kneewall height. I also decided it would be useful to call Harrison"Snapp" Snapp of Weather Hill Company, who lives nearby and is a friendly guy, to get some experienced perspective. Weather Hill's stock-in-trade is doing historical building well, so I knew he'd be able to see it as both a builder and someone who is tuned into proportion and detail. As luck would have it, he and his wife Valerie were headed out of town for vacation but were able to stop by and look things over with us. Snapp was able to reassure us that we're doing fine and that the proportions work. Beyond that, they were able to suggest ways that we might treat the siding such that the large area of clapboard along the upper west wall might come down a bit, or appear slightly lower, with a freize board.

I now need to do some work to see what will look good before we start on the siding.

Thursday, October 1, 2009

Sunburst


Although I never drew it in the plans, I've been toying around with the idea of doing some sort of sunburst or decorative element in the triangle of the south gable. Looking at the wall yesterday I decided to go ahead with a triangular frame with a sunburst pattern inside.

This morning I launched right into it and a few hours later it came together. It'll be interesting to see it once the wall is standing, but from looking at it on the flat I think it came out really well. Once this little project was complete we installed a bunch of clapboard siding up through the gable so we won't have to do it from the ground once the wall is raised, which will happen tomorrow morning.

The circular piece of wood is from an unused bee hive part I made from northern Vermont cedar, and the "upside-down necktie" piece at the center of the sunburst if from an old wooden dresser that Nancy and I took apart last spring. I saved the nice pieces of wood and this once was a suitable width and thickness, so we just went for it. Its fun to think that a piece of wood that lived for many many decades in a old wooden dresser is now living a new life as the keystone to a sunburst on a house built in 2009.

Wednesday, September 30, 2009

The south end wall


Today we kicked in with the south end gable wall and made excellent progress. With only a whisper of rain the weather was chilly, but good. Word is there was snow at Stowe and thought maybe I saw some coming down up around Mount Ellen, thought its hard to say. Flurries are in the forecast for tonight and we just lit our first woodstove fire of the season.

To cut the notches on the end rafters Joe pulled out his 16" (415mm) Makita timber saw. Impressive machine, huh?

Tomorrow we put on the clapboard and stand 'er up.

Tuesday, September 29, 2009

The Gable-End Wall


Today the gable-end wall on the north end of the house went up. There's a lot that needs to be done before lifting can happen, which we've been doing over the last couple of days. The rafters were shaped and installed, the sheathing was completed, and the furring strips installed. Additionally, we installed the frieze board and some of the clapboard siding at the peak, since this stuff will be hard to access once the wall is up.

Tomorrow we start on the south end.

Rafters


Yesterday Joe and I shaped the gable end rafters and then installed them in the gable end wall in preparation for lifting the wall, probably today. There are some fussy details that have to do with the way the roof sheathing will meet, so it took some time and careful planning to make sure we were on the right track.

Before we finish off the wall we'll be installing trim and some of the clapboard siding up at the peak of the wall since this stuff is so much easier to do while the wall is laying down then it is at the top of a ladder some 25-30 feet up in the air.

Saturday, September 19, 2009

The Week in Review


With good weather continuing, Joe and I completed building and sheathing the second floor deck of the main part of the house. We haven't built the floor over the kitchen yet because we decided to build it a bit differently then originally conceived which requires delivery of a bunch of rough sawn lumber. So, we're building up to the point that we can until that delivery happens and then we'll build the rest of the second floor.

In the mean time, we spent time laying out the gable end walls on the deck full size with chalk lines. In other words, we drew the gable walls on the floor as a means of determining our stud lengths where they meet the roof rafters.

We then cut all our wall parts for both walls, north and south. We can't complete these walls until the rough sawn lumber order shows up, so we moved onto other projects.

To keep busy we installed an important structural steel post in the basement, finished building the stairs down the hatch to the basement, and installed the Bilco bulkhead hatch that goes over the stairs. With these complete we started on the porch, located off the kitchen end of the house. We dug, set, and poured the concrete piers and then installed the ledger that will carry the joists.

It was a productive week and we are well positioned to put up the roof efficiently once the rest of our materials are on hand.