Showing posts with label Felton. Show all posts

Tuesday, March 22, 2011

Door Knobs

A brass and porcelain combination in the upstairs bathroom door

A brass assembly in the first floor bath door

The latch mechanism. I buffed out the rust, put in some grease and put it back together. It works great


Mortising out the opening for the mechanism

Last weekend Nancy, our friend John, and myself went antiquing and among the items we came across were some nice antique door knobs. I've been holding off on drilling the holes in the bathroom doors until we decided on the knobs and mechanisms because old mechanisms are a different size then modern ones.

I mortised out the space for the barrels and then fit the knobs. The porcelain set we've installed in the second floor bathroom door came with a connecting rod that was just a little too long. Faced with this I called up Felton next door and asked if he might have any of these common, but old-style, connector rods. Lo and behold he did.

It delights me that some old door knobs from who knows where are now an integrated and useful part of our home and will be for years and years to come. In part with this is that rod that's been sitting in a coffee can of Felton's for years, maybe decades, and is now found a new life in our house. So cool.

Otherwise, I've fixed up some plumbing issues that were needing attention and wiring up light fixtures.

Sunday, February 13, 2011

About that spider...


So, I led off the last post with a suggestive title about a spider, but didn't explain. I was pretty bushed when I wrote it and decided I get back to it later.

Here we go:

In the wee hours of Saturday morning, sometime around 3:00am, Nancy and I were fast asleep when we were jolted awake by the piercing wail of the fire alarm. In a flash we'd opened windows in case there was an accumulation of CO (which our units detect, along with smoke). We didn't smell any smoke and couldn't sense anything suspect in a quick survey. The alarm stopped in a few seconds.

We then spent a short time locating the written directions that we'd stored away. Nancy rooted around out in the yurt and found it. Upon examination we discovered it was the Spanish edition. Caramba! No sign of the English version.

Next up we found our model on the Internet and we're able to understand the blinking red light next to the "smoke" label. A push of the button cleared the unit back to green. While up on the ladder examining the detector I noticed a small brown spider perched in one of the small openings to the interior. Nancy had read through the various possibilities for a false alarm and among them was the presence of insects. It seems this little critter was the source of our troubles.

The electrical code requires hard wired alarms on each floor of the house and there is a battery in each unit in the event of power outage. Because we have a boiler and propane gas cook top in a very tightly built house we had Felton install CO/smoke alarms on each floor although the requirement was something less, perhaps only a CO detector in the vicinity of the boiler and smoke alarms in other areas.

I tried to get the spider but had no luck. As far as we can tell, he or she is still there and I'm not sure what we're going to do about it. This event got me wondering if there might be a fine-mesh screen around the alarm that wouldn't interfere with it's function. I'm going to write the manufacturer and ask about that.

Saturday, January 29, 2011

This weeks' work

One lamp refinished, one waiting for some work

Nancy getting ready to apply the oil finish to the cabinet doors and drawer fronts

The step that Adam built down to the guest room on the second floor

Adam putting in the plugs on the stair tread screw holes


We rounded off this week with more along the same lines as recent work. Adam got the majority of the stairs in and all the screw holes plugged (there are two stairs left to go that require some special shaping before installing, so that'll happen next week). Nancy began work on finishing the cabinets, which is a multi-stage process over many days (we are copying our friend Kate's recipe for cabinet finish which starts with an oil finish and the multiple coats of polyurethane). I did a small rewiring project to make a the switches in the guest room make a little more ergonomic sence, and Felton was here to wire up our stove/oven in the kitchen.

I spent this evening cleaning the oxidization and accumulated stuff off of one of a pair of lights that we plan to mount outside the west end garden doorway. I just happened to come across these lights a couple of months ago in a free pile outside someone's place on the chance we might want to use them. They strike me as a little formal, but they are nice lights so we are going to put them up and see what we think.

Sunday, November 14, 2010

Lights, camera... LIGHTS!

Felton rendered this ugly tangle into an elegant flow channeled into the electrical panel

The light in the root cellar. This is particularly satisfying to have working because it is otherwise super dark. Now we don't have to mess with headlamps to find what we're looking for

Lights at the peak of the second floor ceiling

On Friday, Felton did the final piece of the house electrical wiring project by wiring in all the various circuits to the electrical panel. It was a bunch of work and he worked longer then his usual afternoon session in order to complete the work he had started. With great fanfare he put the coverplate back on the panel and then proceeded to flip the breakers one by one.

With this, most of the light switches and outlets throughout the house are now live, including the smoke/carbon monoxide sensor system which must be wired in by code. In a couple of cases the breakers wouldn't flip, so Felton has to come back and trace the problem, but hopefully that won't present any major obstacles.

Tuesday, November 9, 2010

Doors and Cabinets


I sorted out all the various plywood parts I cut a week or so ago and assembled the kitchen cabinet boxes today. It went quite smoothly and everything fit together as it should. Tomorrow I fix everything in place and start in on the face frame.

Meanwhile, Felton was back continuing work on the electric and has the house nearly all wired up. The one missing element is light fixtures which we have yet to either make or purchase, so for now he is installing your basic porcelain-base fixture so we can have light until we sort out our fixture choices.

Joe wasn't here today but spent the last few days previously installing the interior doors. We all think they are quite handsome.

The tub got it's first coat of yellow-orange. We're diggin' it.

Thursday, October 28, 2010

Light Fixtures

My first pass at making a light. If you click on the photo a time or two it'll embiggen enough for you to see the twisted wire, which I'm particularly fond of

Various lighting parts

The plywood parts for our cabinetry all cut up and ready for assembly

Yesterday I received a bunch of lighting and electrical parts in the mail. I plan to start experimenting with various light fixture ideas and I'm really excited about it. The materials themselves are beautiful -- lots of brass, copper, porcelain, nickle plate, clear and colored glass, and vintage fabric covered double twist wire. Great stuff.

In order to qualify for certain Efficiency Vermont rebates you need to have a minimum of 10 pin-based fixtures hard-wired into your house, so we need to determine which will be pin based and which will not. Happily, I can build most lights as pin-based sockets, but some will not work because of size constraints.

Today I experimented with one of the insulators. The first task was to drill a hole through the top of the 3/8" thick glass. This took a while but was no problem, although I was a little paranoid about the glass powder produced. Seems like a potential hazard. Maybe having a vacuum on hand and running it often? Maybe make a vacuum-table work surface? In any event, once I had the hole drilled it was quick work to wire in the little light base, mount it in the light and wire a plug to the other end. I pretty much thought of everything I might need except --you guessed it-- a light bulb. I was able to find one that sorta fit from our old chandelier just to get a feel for it, but it takes away from the effect, so it'll be nice to get a more appropriately fitting bulb. Other then that, it was a piece of cake. I'm pretty excited to make more.

I spent most of the day cutting up the plywood for our cabinetry. Unless I made any mistakes in my plan, I should have everything I need to build the cabinet boxes with what I cut today. After this it's back to hard wood for the frame, doors, and drawers.

I'll be taking a working vacation next week because I'm teaching a class at Yestermorrow called "Less is More". The class is a design course centered on small homes and living spaces. So, my work on the house will be minimal-to-none, but Joe and Felton will still be here making progress.

The Clawfoot Tub

The claw foot tub post-scraping, pre-primer

Semi-cryptic info cast into the bottom

Electrical insulators waiting to be turned into lamps. I am super excited about this little project
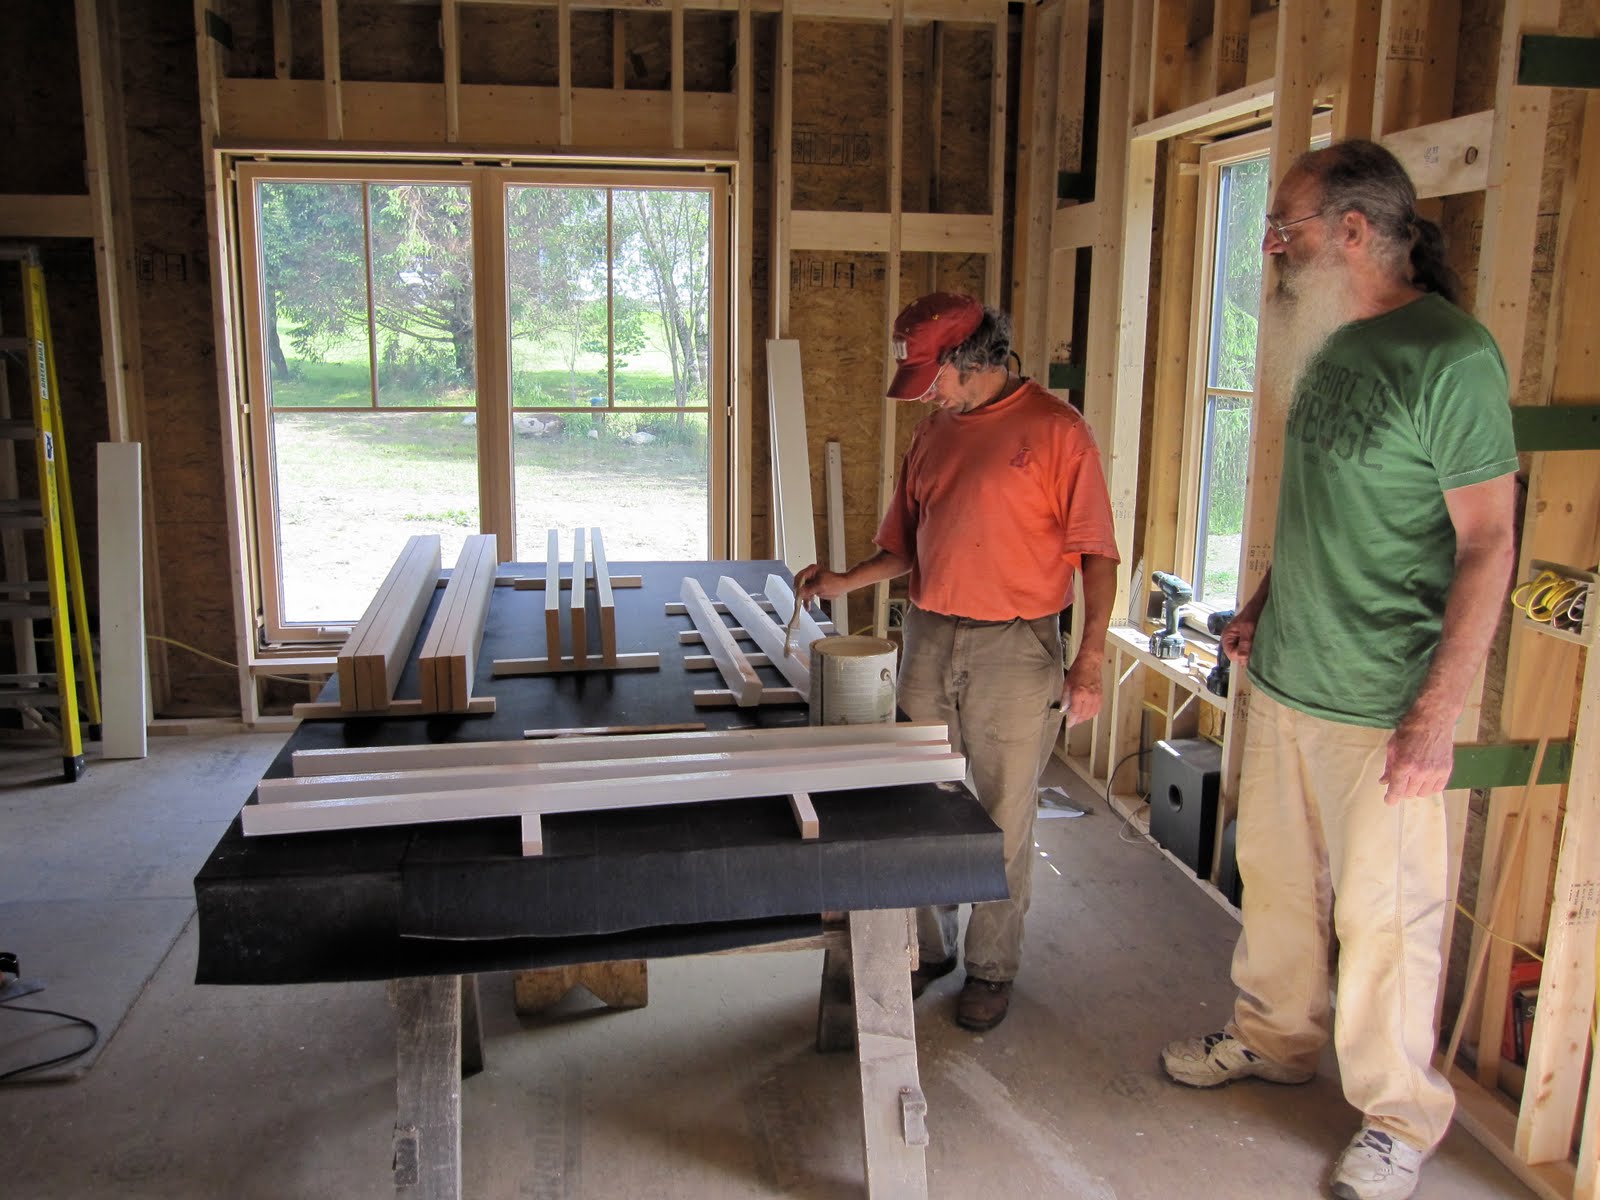
The cabinet bases

This afternoon I scraped the loose paint off of the claw foot tub we'll soon be installing in our upstairs bathroom. Until today I don't think I ever looked at what the works cast into the bottom of the tub. Here's what it says:

Richmond
5 -26
6 6 38
D-5

My guess is: The maker is Richmond, the size is 5' x 26" (this is pretty clear because those are in fact the overall dimensions), it was made on June 6th, 1938, and maybe D-5 is the lot, batch or style number? If my assumptions are correct, I'd be just so happy to know that this tub was made in 1938. I would never have guessed, but then again these things really don't age, do they? In addition to the above info, there is a number by each foot attachment point specifying the correct foot placement, 1 through 4. After scraping off the old paint, I gave the tub a coat of primer. After another coat we'll then give it it's groovy orange finish coat.

I acquired this tub from a former colleague in Boston who, if I remember correctly, got it from somewhere in New York, but I'm not sure about that. Either way, I love that this antique will continue to live on in our new house.

Speaking of antiques, I received a large handful of vintage electrical insulators in the mail that I purchased cheap on eBay. A couple were broken when they arrived, but for the price I'm not sweating it. Mostly I just wanted to get some of these in hand to start experimenting making lights. Joe also brought a nice one from his place for us. I'm excited to start playing with these things.

Joe is nearly done with the window project and will soon start on installing the interior doors. It really feels like things are moving along.

Meanwhile, I have the kitchen cabinet bases built. I still need to fix them to the floor, but that'll be easy and then I'll start on the cabinet boxes.

And lest I forget, Felton has been here most afternoons lately steadily hooking up all the wiring. He methodically worked through the outlets first and is now most of the way through the switches. I know when I was putting in the wires there were times when I wondered if it all was going to make sense when push came to shove and things got hooked up. So far so good. It's going to be really cool to flick a switch sometime in the near future and presto, a light will come on.

Right, one more thing about the tub. Way back two winters ago I went down to the little storage shed that the tub was in and tried as best I could (without actually pulling the tub out and assembling it) to figure out it's standing height so that I could plan the height of the sill in the bathroom to match. Today, with the tub on sawhorses, I attached one of the feet and checked it against the finished window sill. Sill height: 21". Tub height: 21". Yes.

Tuesday, October 19, 2010

Onwards...

Painting the bathroom floor


The boiler at work heating up the house via the radiant system for the first time

Today Joe continued work on the window returns, which is coming along, while I was busy painting in advance of his work. Meanwhile Felton was back to do some finish electrical work. This is very exciting for us as it means we'll have working outlets around the house and a few lights here and there to turn on. Of course this also means we have to make decisions about light fixtures and all that, but its great to see all this stuff coming together.

We also fired up the radiant heat for the first time today. Stuff like that sort of seems like a bit of a miracle; you put all this pipe in, you have a boiler installed and then you do nothing for a couple of months when it starts to get a little chilly in the house and you hook up a thermostat and signal the boiler to start doing its thing. On the one hand its what's supposed to happen and all, but on the other hand it is like "Wow, you just push a button and like that the house starts to heat up. Cool!"

For extracurricular fun I continued painting this evening and gave the second floor bathroom its first coat of blue floor paint. Both Nance and I dig it and are feeling ongoing happiness at having Teri's help working out all the color choices. The house is anything but boring when it comes to color, and that's what we were shooting for.

Tomorrow I go back over the mountain for another load of lumber for window trim and the bead board that will go around the bottom of the bathroom walls. I'll also be looking for a large stone hearth to put the woodstove on.

Friday, June 11, 2010

Water!


Today was a milestone.

Thanks to the work of our plumbing contractors, the boiler was installed, providing us with both heat (in the form of radiant heat under the floors) and hot and cold water. We've been waiting a long time for this and it was a moment of joy to witness the cascade of water pouring out of our garden hose hook-up on the side of the house. We now have the potential to hook up any old fixture we want and will be thinking about how we may do that, and when.

Meanwhile, Joe has begun work on the exterior window trim project. He's set up a work station and begun cutting the pieces. It'll be really satisfying to see the outside start to transform from green Zip-system to finish trim and clapboard.

I've been busy wrapping up the seemingly endless details before we begin insulating. I expect we'll get going on it next week.

All in all a good week of progress.

Glass of water anyone? Here, let me get you one.

Monday, May 10, 2010

Basement Stairs: Check


,
The stairs to the basement are complete and we are happy with them; not too steep but not to plush either.

Likewise the electrical panel is in and Felton wired in a number of outlets from the house that will serve as our power supply. We would have actually had the main power line running into the panel except that the electrical supply house cut the line at the wrong length. We'll get it in place today. At that point the power will be live in the house.

Thursday, May 6, 2010

Stairs and Electric


I noticed, after taking this photo, that it was roughly 10 minutes after noon. I then wondered if at noon on the equinox if the shadow might line up directly with the sunburst triangle. That would be really satisfying. I did my best to align the axis of the house on south.

Felton installing the conduit connecting the panel to the conduit running to the meter

Stairs in progress

My mighty assistant helping me muscle the stair set into place.
The stairs will finish at a small landing at the bottom which Nance is standing on


I've been building the stairs from the first floor to the basement and they are almost complete. I'll finish that project tomorrow. I'm not sure why I waited this long to do this project--perhaps because it is sort of fun and a bit of a reward for having the plumbing and electric in place. It'll sure be nice to go up and down stairs rather then the ladder.

Meanwhile, Felton has been at work installing our electrical panel and connecting to the conduit running out to the meter near the pole. With luck, we'll have power running into the panel tomorrow. Once that's done, well make a few of the outlets in the house live so we can run things from the outlets rather then the jumble of extension cords and power strips we currently have in place.

Wednesday, April 7, 2010

Down in a hole

Glad I don't have to do this too often

At work about to install the new power pole. The new pedestal is just past the man on the left

The PVC conduit running from the pedestal down through the trench to the pole

Still concentrating on preparations to take down the garage, I've spent the last two days digging a ten foot long trench that is three feet deep between our electric meter pedestal and the newly installed telephone pole. It was going fine until I hit the cementazoic layer--consisting mostly of super dense rock and clay that really was cement like. At one point I was considering giving up, but just about then started to break through to the next strata down and realized I'd be able to work through it.

Today I laid in the pipes for the new power service coming from the pole and got a start on the piping for the phone line as well. Felton has been coming up periodically to check on the progress and keep an eye on my work.

All this will allow us to remove the electrical panel and meter from the garage in anticipation of next week's work.

In the meantime Nancy has spent her evenings moving the firewood to its new location away from the garage and I'm slowly working through all the tools, bike parts, and random shoe-making machinery in the garage.

It'll all come together, but we've got a lot to do!

Friday, March 26, 2010

Friday Edition


There's some tidying-up to do, but I finished all the significant electrical work today. I'll have Felton come up again early next week and we'll do another walk-through to find any omissions or problems.

Monday, March 22, 2010

Closing in on the electrical

The electrical punch list

Some wires in place

A triple switch box in the kitchen

This is where the bed will be. You can see the matching outlets and light switch boxes to the left and the right with the blue light mounting box above in the center


Last Friday Felton came up to the house and did a walk-through with me to go over the progress on the electrical work. It was useful and as we talked I made a list of things I needed to change, correct, or complete. With the list in hand, I want to work through this stuff and be as done as I can be with the electrical work. I hope that I'll be there in another day or two, although it seems to go slower then it seems like it should.

Before moving on I'm going to go around and label everything so we know what is what and what is going where for what purpose. I've been labeling along the way, but not thoroughly, so I want to make sure we can understand everything once the sheetrock is covering the wires snaking through the walls.

The challenge is to anticipate and wire for intuitive light switching as you move through the house. I drew this all out in plan but have found myself mostly just doing it from feel in the actual house. Today I ran a circuit that allows us to turn on a light centrally located on the first floor from either entrance doorway or at the bottom of the stairs. A similar issue has been working out lighting for coming up the stair and going to bed. We've decided that we'll have a light over the bed that can be switched from either side of the bed and at the top of the stairs as you come up. The last photo shows the boxes in place for this as well as the blue light mounting box affixed to the rafter centered above.

I'm ready to get done with the electrical work and move on to completing the plumbing.

Tuesday, February 16, 2010

Wiring continues


I've spent the last couple days continuing the wiring. It's going pretty smoothly, with a question here and there for Felton to make sure I've got the right idea. Its taking me longer then I would have guessed once I got started, but I think I'll have the lion's share in place tomorrow or the next day.

After that I'll probably start in on the basement stairs or the office walls to take up some time before Paul and I take up with the plumbing.

Today I ordered the parts I need to build a set of pocket doors going from the living room to the office. I think it'll be a nice way to have the option of privacy or openness between the two spaces.

On a different front, Nancy and I spent 1 1/2 hours yesterday afternoon at our local appliance and fixture store contemplating washing machines, stoves, dishwashers, toilets, etc... there's a lot to figure out and we are hoping to make a bunch of purchases on March 6th, which is a "tax holiday" here in Vermont. Wish us easy decisions and harmonious discussions!

Thursday, February 11, 2010

Running the wire

Felton, pointing me in the right direction

Where the load center (circuit breaker box) will be located in the basement

Some wiring in place

The to-do list

After a look around and coming up with "what's next" yesterday with my stepfather Felton, who is a licenced electrician, I started off on the electrical work today. I ran the wiring from the kitchen receptacles and appliances down to the "load center"--formerly known as the circuit breaker box. Its pretty basic, but this is the easy stuff. Its the actual wiring the switches, outlets and fixtures that comes later that baffles me.

I worked my way around most of the first floor today and will finish it off tomorrow. That leaves the second floor for early next week. Today I also boiled down the plans for the stairs to the basement.

Since I'm somewhat dependent on the help and timing of others, I made a list of things that I'll do while keeping the plumbing and electric rolling. There's plenty to do, but it helps to have it laid out in a list in front of me.