Showing posts with label bathroom. Show all posts

Tuesday, May 17, 2011

Bathroom Vanity

The hinged mirror door closed. Note the "hanging" tilt to the mirror

Note the outlet in the right-hand side of the cabinet. The electrical cords run down and under the removeable wooden shelf and up to the chargers, keeping things neat.

Early on in the project as I was edging out the sheetrock opening

We were away on vacation for a couple of weeks and a project I had started before we left only got finished yesterday, namely the mirror vanity in the second floor bathroom.

We had sheetrocked over this area and planned to come back at some point and build a vanity in the wall cavity with an openable mirror mounted on the opening.

For a couple of months we had this great old mirror hanging there and I enjoyed how the mirror hung slightly off the wall at an angle. When I began this little project I wanted to maintain the look of a hanging mirror, rather then have it lay perfectly flat against the wall. This took some tricky hinge work to make happen, but it came together well and achieved the look I was going for. Nancy and I picked this mirror up off the street in North Adams, Massachusetts at least 10 years ago and have had it hanging around since. With a little paint and clean-up it's got a nice stately feel.

A second aspect of this little project was wiring in a receptacle in the cabinet that we could plug our re-chargeable toothbrushes into, rather then having them messily draped out in the room. I built a little raised shelf so the wires of the chargers run down out of the outlet and under the shelf with just a little wire coming up to the charger. This keeps the cabinet free of the wires as well. I'm pleased with how its all come together.

Sunday, April 24, 2011

Artwork

A framed Bread & Puppet poster outside the first floor bath

A oil-pastel of the yurt hanging in the stairway positioned essentially where the window view corresponds to the view in the image.
A close up of the yurt oil-pastel

The vanity in progress

We've started hanging bits of artwork here and there.

It is (for me at least) a somewhat cautious process of pulling things out and thinking about what might go well in any given spot. Its not like we've got a massive trove of great artwork, but we've got a few things and its fun to contemplate putting them up. I find when we do, it adds a sense of completion to an area or a place that is very satisfying.

I was a Fine Arts major in college and did a bunch of painting over the years. I've also done woodblock prints as well and it'll be fun to dig into some long-packed away work and see if there is anything that merits hanging on our walls. In actuality, I've given a lot of my best pieces to other people as gifts, so I doubt there is too much that I'd really feel that enthusiastic about hanging up.

Nancy was a Peace Corp volunteer in Papua New Guinea in the late eighties and acquired a number of really cool figures, masks, spears and other local craft that is also really fun to think about finding a home for in the house.

Unrelated to any of this I've been busy building a vanity in the second floor bathroom that will be housed behind the hanging mirror that we've had in place for the last couple of months. I want it to work so that the mirror still hangs off the wall at the slight downward angle that it does when it hangs from a nail. That is making the execution a little more complicated, but I think it'll work out pretty good once its all together.

Monday, March 14, 2011

Loose ends

The toilet paper holder in the upstairs bathroom. The top part is a shelf and the bottom holds about 6 rolls of tp down in the wall cavity

When we installed the sink the spacing of the lights overhead was off (originally based on the assumption of a longer sink) so I had to re-locate the wiring and then patch up the wall

The appraiser for the bank is coming on Thursday and I am tying up the various loose ends that would make the house appear unfinished, such as the t.p. cubbies in the bathroom, the shelf over the closet on the first floor--things that aren't that big to do, but are nonetheless incomplete. The last thing is lights and I put in a big order for lighting parts last week. I'm hoping they'll get here in time that I'll have the lights looking done, even if they're not quite. There are also multiple touch-up spots where we've cut into the sheetrock or done something that now requires a touch up.

Provided I get the stuff I need, I'll be whipping together a bunch of lights before Thursday AM.

Saturday, March 5, 2011

Lights and a Cape Cod Sink

New-old sink in the first floor bath

Another view

Building a lamp fixture

A light hanging over the dining room table from track. We have a vision of a series of small lights hanging here at different heights

Disassembled exterior fixture about to be painted black. This was mounted on the the old garage and will now serve as the fixture that lights the walk route into the house

I've been working on installing track where we'll have track lighting in the kitchen and dining area. This required a little sheetrock work again; cutting strategic points to wire or re-wire to make what we need to have happen. In the case of the kitchen track lighting we decided to make the track tw0-circuit so that we could have some or all of the lights on depending on which circuit they are fixed in. This allows, say, the light over the sink to be on it's own circuit and switch from the rest of the lights that light the counters. I'm always a little hesitant to cut into the sheetrock, but usually it goes pretty smoothly and I'm mudding it back up in short order.

I've built up a couple of lamps and they look just fine. One is hanging over the kitchen table, the other is over the kitchen sink. More to come.

Remember that big old sink we had in the downstairs bathroom? Well, it has moved down closer to it's final home in the basement. In it's place we've finally installed the sink that Nancy's parents Lee and Lou brought to us last fall. It's a great old marble sink that used to be in the bathroom at their house on the Cape. Its kinda battered and stained, but it's got a good measure of beausage (pronounced like "sausage", as in beauty-through-useage) and looks quite handsome in out bathroom. We're planning on replacing the faucet controls because they are kinda beat up and sorta unattractive. Eventually we'll build a cabinet that the will replace the brackets that the marble sits on right now.

One more piece of the puzzle in place.

Wednesday, December 22, 2010

Slate and Tile

Detail of the tile pattern in the shower


Our kitchen floor slate pattern. We were surprised, but not unhappy, at the color variety that falls under the "purple" designation. The little white things are spacers.

My main mission today was laying the hardi-backer, which is the cement board underlayment placed on the floor before the slate floor goes down. Luckily, Jake was here working on the downstairs shower and so was able to guide me as I mixed the mortar and tried my hand at a process I'd never done before. It went just fine and worked out nicely.

Meanwhile Jake was installing the tiling in the shower and did nice work. We changed our tile design after it became apparent that my original concept required tile sizes that were not available. Last night Nancy and I calculated the quantity of tile we had to work with and came up with a new horizontal-band concept that used the available tile well. Jake went to it and at the end of the day had two of the three walls complete. We're quite happy with the result.

Tomorrow Nancy and I are all set to install the slate in the kitchen. I laid out a box worth of the pattern and was both surprised and pleased at the color variation in the "purple" slate that we purchased. In reality there is a mix of gray and purple slates with some very interesting green spots among the purple. Nance commented that we had struggled over what color to go with and in the end kind of wound up with a little of both our choices.

We're both excited to put down this floor tomorrow.

Sunday, December 5, 2010

Wide Pine Floors

Pulling the boards in through the second floor bedroom window

The expertly stickered stack of floor boards on the first floor

From the archives: This picture shows the delivery truck that brought a big lumber order, including our floor wood back in September 2009.

Today our friends Sally, Jeremy, Anda and Silas came up to help move the pine floor boards from the basement to the first and second floors. We've been storing them for over a year now since we received them along with the massive lumber delivery for the roof framing in the fall of last year.

To move the lumber to the upper floors we each had our jobs: Nancy and Sally and Silas pulled the 16' long boards up through a window on the second floor as Jeremy and I carted them up from the basement and positioned them at the window. Meanwhile Anda stickered each board as they came in. At some point I broke off and started churning out more 3/4" square stickers to keep up with demand while Jeremy continued moving the boards. It was a big effort but felt effortless with the help of such great folks. I had pleasure imagining Anda telling friends at school tomorrow that she stickered wood and her friends saying "What's that mean?" and her being able to tell them.

Beyond this, Nance and I have been quite busy painting, prepping and such. I've been working steadily on lowering the floor of the first floor bathroom shower floor by three inches. Its turned into quite a project. But more about that later.

Tomorrow I go pick up our bathroom tile order.

Saturday, December 4, 2010

Installation to Relaxation


I made a push last week to have the tub installed for the weekend and it happened. Most of the effort was in the multiple coats of primer and then paint on the beadboard before the tub could be placed. The actual installation involved a bunch of plumbing prep and stuff that I had I known way back would have been a bit easier. I'll know for next time.

In any event, late last evening a major emotional and functional moment was reached as I turned on the tap and climbed in. For seven and a half years we've trekked down to my parent's place for baths and showers, which has been really nice to be able to do; it seems that chapter ended with a successful check for leaks and grabbing a towel and some soap.

This is a moment we've been waiting for for a long time!

Saturday, November 20, 2010

Status Update


Here's where we're at:

Having installed the beam in the basement I then switched over to reading the second floor bathroom to install the toilet, which happened this morning. Woo hoo! This house is a study in modern miracles, one-by-one and at a moderate pace. In order to install the toilet I needed to finish installing the bead-board, baseboard and cap molding, and then paint it all.

Joe has been working on the stairway project, installing the skirt boards on either side of the stairway and shaping the stair treads and risers in anticipation of installation sometime soon.

I will be returning to the kitchen cabinetry project next week and will probably install the tub in the next few days too up in the second floor bathroom.

The house is more and more our home. It's cozy and it feels good.

Sunday, November 7, 2010

The tub comes upstairs

The tub very near its new home

Carrying the tub in


Nancy and I continued work on painting and installing bathroom bead-board respectively this weekend, with some nice progress to show. It won't be long before we'll start using words like "done" and "complete" regarding certain specific aspects of the process.

Most fun of all was getting help from our friends Dan, Addie, Matt and Hannah who helped us carry the claw foot tub in from the back yard and up the stairs to the second floor. It actually wasn't that bad, but then again we had lots of hands making it possible.

I'm back from teaching and ready to get rolling again...

Monday, November 1, 2010

While I'm away...


..teaching at Yestermorrow this week, work is continuing.

Nancy has been continuing to paint and Joe is working on finishing up the window trim around the house, and is nearly there. Soon after will follow the installation of the interior doors. Fun.

I spent a little time over the weekend installing bead-board in the second floor bathroom. It goes really quick, but unfortunatly I ran out of time and I'm not sure if I'll be able to get back to it until the end of this class.

In any event things are moving along.

Saturday, October 16, 2010

Fall Colors


Nancy went at it today with painting. We are trying to stay ahead of the window trim installation, so she worked in the office first and then upstairs in the bedroom rolling on the color, and covered a lot of ground, or should I say wall.

Meanwhile I got to work on putting down the floor in the second floor bathroom. It took a little time mapping the layout so that when the floor is continued in the rest of the area around the bathroom it all finishes off like we want it to.

Sunday, May 23, 2010

The Second Floor

A drawing of the second floor plan. (Click on the image for an enlarged view)

Our friend Mary recently wrote asking about the second floor and what our plans are.

It was an astute question because the truth is we haven't ever really nailed down our plan for the second floor. At some point way back we decided we could sort it out later. Well, later is now, and we are trying out different ideas.

We've actually been sleeping in the house since the end of April and so have had an opportunity to place our futon in various locations to see how it feels. We started off with the bed in the upper left-hand corner of the main room. That had sort of dark light and no distinct views. It felt sort of just shuttled out of the way. Mary's question got me thinking that we needed to pay a little more attention to this area of the house and so I started playing around in Sketch-Up and soon found myself placing the bed lined up to look west out the double windows. It looked good in the drawing, so I slid the bed over and tried it out. Lo and behold, it felt good.

The issue with this spot is that it is very near the current entrance to the bathroom, so in order to make way for passage to the bathroom we slid the bed a bit to the left and now are going to try that arrangement. I'd rather the bed be lined up nicely with the double windows, but something has to give.

The other issue involved here is guests and the guest room. We'd like to make it so that guests can come up the stairs and pass by our sleeping area without the feeling like they are completely walking through our room. The arrangement as shown above doesn't quite do that, but we are going to dwell on it a bit and see what thought come up.

More on all of this later...

Tuesday, March 2, 2010

Which kind of fool are we?

A farmhouse style sink with various faucet options

Shower head and controls

A couple of toilets--traditional styling? dual flush?

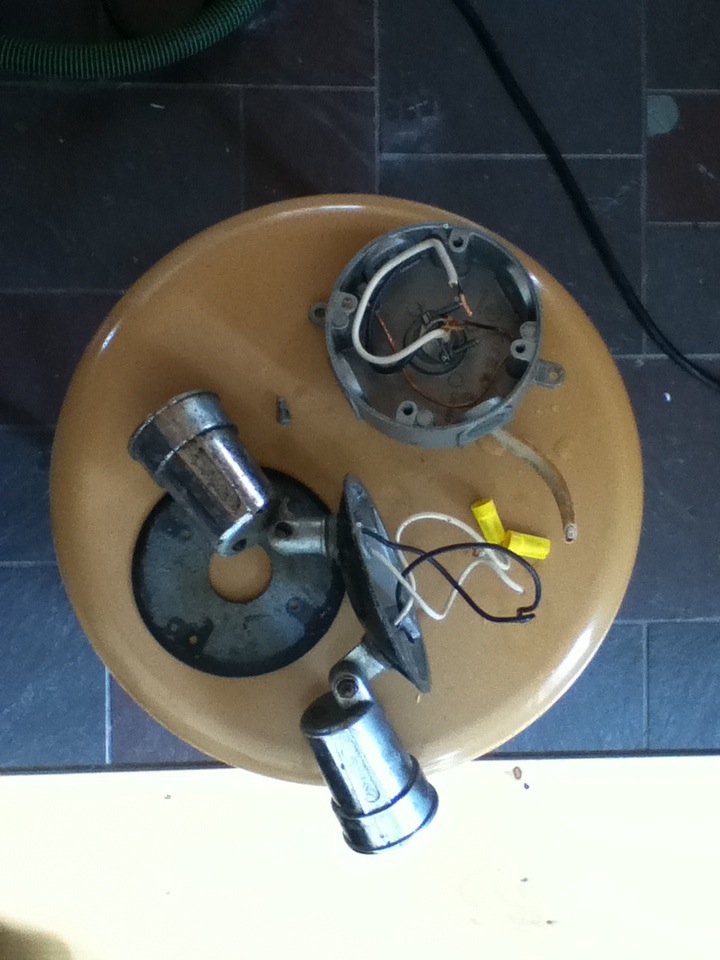
What's known as a Schoolhouse style antique lamp

Some used doors. In a few instances we found them being sold in a collection of matching sets

We have been focusing on a few other aspects of the project over the last handful of days.

We have spent considerable time sorting out the options for kitchen appliances, the kitchen sink, plumbing fixtures for the kitchen and bathrooms, as well as doors and lighting. It's takes a certain kind of perseverance in the face of so many choices and little basis to work from other then intuition. We've made tons of headway and have the lion's share of the decisions made. This has included hours on the internet sorting through descriptions and makers trying to make sure we're comparing apples to apples, and then lots of time in the car driving from retailer to retailer to get the sales pitch and see for ourselves what seems like the right choice.

So far we've actually purchased a dishwasher and laundry washing machine. We feel like we made good choices in both cases.

For a long time we've been hoping that we'd be able to use old doors throughout the interior but upon looking at the options we are sort of leaning towards new. There are lots of doors out there, but in almost every case there is the factor of refinishing, concern about structural tightness, and feeling confident about the style that has kept us from certainty when sorting through racks of old doors.

Lighting was really fun to look at, especially the offerings at Conant Metal & Light in Burlington. They make beautiful lighting that they sell along with tastefully selected choices from other makers. This stop got my creative juices going and I left feeling inspired to make some of our lighting. I'm looking forward to digging into this...

An aspect of this whole effort that's had us kind of uncertain is this: We started our shopping day off at a plumbing supply house that has a showroom for the public but only sells through contractors. We spent considerable time looking at options and in the end made choices we felt good about. I would typify their selection as mid-to-high quality. Nice stuff with a range of choices. Nothing cheesy.

Our quandary came at the end of the day when we stopped by Home Depot to "just look" after having looked at lots of other generally higher quality retailers throughout the day. When we started looking around we were just confused. How can a faucet be $600 at one outlet, and $150 here at Home Depot? Is the qualitative difference that great? What gives? I've been joking that we started feeling like we didn't know which kind of fool were are: A) buying into the price-equals-quality-and-we're-worth-it foolishness, or the B) huh-that-looks-pretty-good-and-its-way-cheaper-and-can't-be-that-bad kind of foolishness. A fool either way? Who knows.

Its hard to say what the answer is, but I find it helpful to think of the qualitative differences about something with which I AM familiar, like bikes, and that helps me remember that similar looking objects can have significant qualitative and functional differences. So, having consulted with others whose opinion we trust and having thought on it a bit, we are erring towards quality where and when we can, at least with high-use and high-contact items like the faucets. I said to Nance tonight that I'd rather have a decent stove then a premium toilet.

Somethings got to give sometime, somewhere.

Onwards....

Snowy days to build walls


Last week saw a welcome snowstorm after a full two months of no snow whatsoever. It was fun to see the snow pile up on the roof and then slide down in a big wuuuummmphff around the house.

While the snow was coming down I completed the wall that houses the pocket doors. This wall defines the office space and, despite our worries that the space would be compromised with a stair hatch to the basement, it feels like its going to work out pretty well. The doors are a good way to separate the living room area from the office area. I finished off the office space by building a little triangular hanging wall that encloses the upper part of the stairs.

That brought me to finishing the bathroom/washing machine/closet configuration on the second floor. I've now reconfigured that little are three times and I think we're good at this point. Here's the history:
1.The first iteration was simply an end wall with a doorway in it. As described in the last post, we decided that moving the door around the corner would be a better use of the space. There is a picture of this configuration in the Feb. 18th posting.
2. The second arrangement had the door around the corner with a closet adjacent to the end wall to house the washing machine. This is what is seen in the fourth photo.
3. We decided we didn't like how far out the closet came so we decided that we could steal some space from within the bathroom to house the washing machine and use the our nice looking existing armoire as a built-in in place of a enclosed closet. Photo number five.

We're going to stick with this layout for the time being.

Monday, February 22, 2010

Pocket Door Wall


Today involved building the wall between the living room area and the office space. This is a wall with double pocket doors. The doors will roll into the wall to create a wide pass-through opening between the rooms. Our goal here is to have the option of privacy while also being able to keep the office space open and accessible to the larger living space.

The wall took a little planning and then some careful work to build. It is essentially two parallel walls that are joined at the top and then fixed to the floor but have no connection inbetween, where the door passes through.

With the warm temperatures outside I barely needed the woodstove today and by the afternoon it was pretty warm.

I left the space over the pocket door wall open in case we decide we want to install some sort of transom lights overhead, as we are planning to do over the bathroom doorway. The office and bathroom wall frame the stairway on either side and are in the same plain, so there is a logic to creating a similar look across the whole wall surface.