Showing posts with label wall. Show all posts

Thursday, February 18, 2010

Sleepless

Last night I didn't fall asleep right away. While I was laying there I was thinking a bit about the configuration of the bathroom on the second floor with washing machine right outside the door.

Here is an image that roughly shows where the washing machine is in relationship to the door. Although this sort of packs the washing machine away, it leaves almost no room for storage around it.

This configuration wasn't sitting quite right with me and as I stewed it over it came to me that we should move the door around the corner to take up the little square of floor over the stairway.

When I woke up this morning I talked it over with Nance and then went out to see if this would work.

In order to make it happen I had to essentially move the end wall of the bathroom out another foot (towards the right in the photo above) to make the landing over the stairway wide enough to accommodate the width of a door going into the bathroom. This in turn pushes the washing machine out into the room a little more and creates some extra space in the bathroom that isn't necessary, but isn't a problem either.

So, after looking it over with Nancy, I decided to go for it and by the end of the day had reworked the space. With this arrangement, I'll build a closet along the end of the bathroom that will enclose the washer and provide room for a dryer as well, should we ever want one, and linen storage. Having the door located here also makes good use of that little patch of land over the stairway. There'll be a little half wall along the rim of the stairwell in short order.

Nance suggested making upper section of where the old door was be a pass-through linen storage area from the closet to the bathroom.

Monday, February 1, 2010

Interior walls

The first floor interior walls show (from l. to r.) the bathroom, the closet, and the mudroom. There is a door from the mudroom that will allow access into the closet. The stairs to the second floor will eventually be located to the left of the bathroom.

This photo shows the closet. There will be a built-in shelving unit that will fill the space opening towards the camera. We currently have a shelf of similar dimensions in the yurt and it works well for us.

This is the upstairs bathroom. The end wall with the door was not yet completed when I took the photo.

Last week was a short work week because we went to Boston on Thursday. Mostly I worked on building the interior walls on the first and second floors. It went pretty smoothly.

I was apprehensive that building in the walls would somehow diminish the experience of the first floor; that it would suddenly feel small and cramped and chopped up, but to my relief it actually still feels spacious and open.

Having these walls in place allows me to start laying out the electrical boxes; the switches, the outlets and the mounted lights, which is what I started working on today.

Thursday, January 21, 2010

The five inch move


I chalked out the walls on the first floor. The space in front of the door will be the mudroom. The area where the table saw is sitting will be the bathroom, and the plumb bob (the pointy weight on a string) is hanging from the stair opening on the second floor to check that it is in line with the wall of the bathroom. It is.

Here's the first floor plan again for reference to make sense of the lines above. The photo is taken near the bottom of the stairs facing towards the doorway in on the right in the plan. (Remember to click on the photo for a clearer view.)


See how the lines on the floor run right into the door? No good. These lines represent the wall separating the mudroom from the kitchen. Correcting this requires moving the door about 5" to the left.

The opening with the door removed

New framed opening done, starting re-installation

Yesterday I laid out the interior walls in red chalk on the floor and confirmed what I was already aware of, which is that having chosen a 3'-0" wide door instead of the 2'-8" door that I'd originally drawn, the door was butting into the wall between the mudroom and the kitchen.

The options here were to either have a slightly bigger mudroom and slightly smaller kitchen, or to move the door. There really wasn't much of a question. Move the door. So, what has mostly been "building" made a slight detour into "renovation". I had to take out the door, reframe the opening 5" inches to the left of the original, and then reinstall the door in it's new location. Easy to describe, but a lot of work to do.

Nonetheless, by the end of the day today I had it back in and fitting nicely, so tomorrow I'll finish up the loose ends of the project and go into coming up with a framing plan for the interior walls, order up some lumber and put 'em up. That should be fun.

Wednesday, January 6, 2010

New Year


Yes, things are happening in the house after a nice holiday break.

The roofers completed the last of their work a few days after Christmas on a breezy morning when the temperature was, if I remember correctly, around 10. It looks great and we are glad to have that part of the project wrapped up.

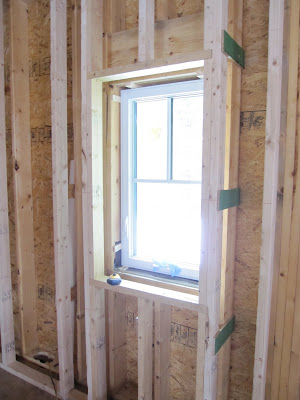
After some satisfying time off, both Joe and I got back to work on Monday building the secondary interior walls. The result is to make our current 5 1/2" deep walls effectively in to 12" deep walls. This requires making walls that parallel the existing walls and are attached at the top, bottom, and at various points between. Hopefully the photos show this better then I can describe it.

The point of this work is that when we insulate the house with the blown-in cellulose, there will be a full 12" of insulation thickness. It used to be that 3 1/2" was considered acceptable and nowadays 5 1/2" is considered good.

In our situation, the two walls have minimal connection, so there is very little thermal bridging from the outside to the inside. In conventional walls the studs create direct thermal bridges from the outside to the inside--the cold passes through the exterior sheathing to the wooden stud and then to the sheetrock on the inside. Our wall system puts cellulose insulation between the outside wall and the interior sheetrock. Breaking that connection is the major advantage of this method while allowing lots of space for insulative fill.

I think we'll wrap up the first floor tomorrow and move upstairs on Friday.

Tuesday, September 8, 2009

First Floor Complete

Monday Joe and I raised the last wall of the first floor and today we buttoned up the loose ends, including blocking in the basement, completing the wall sheathing, and taping the remaining zip seams.

Tomorrow morning we start on the second floor, first with the LVL beam and then hanging floor joists, just as we did on the first floor deck.

This photo shows the completed walls, insofar as I can capture it from the garage roof.

This shows the view over the house. Joe and I will get to experience this as we start work on the second floor.

Saturday, September 5, 2009

The Week in Review

The last few days have been all about continuing building the first floor walls. We've honed the process down to a routine and they happen pretty quickly. The walls weigh a lot by the time they are ready to go up; thanks to Joe's wall jacks the two of us are able to winch the walls up with only a rhythmic work song and some even cranking. Because the plywood runs past the end of the framing to cover the end of the previous wall, we need to build each successive wall out about a foot laterally from its final placement. This means we have to move the wall along the edge of the floor deck to get it in place.

To achieve this we are using some 1" wooden dowels that we place periodically under the wall with the assistance of a hefty crow bar. The elevated wall gets the pressure off the rubber sill gasket and allows us to roll the wall into place.


Wednesday, September 2, 2009

Another day, another wall (or two)

We finished off the north facing wall of the mudroom this morning and then built the little jog that faces east. More of the same: cut list, cut, arrange, put together partially, check the dimensions, fix the anchor strap, square it up, attach the rubber sill gasket, chalk the lines, lay down adhesive at the perimeters, lay down the the ply and nail it, cut out the openings with a router, clean it all up, lay down the seam tape, roll the seams, cut and attach the battens, move the lifting masts into place, attach them, and then, finally, crank the wall up like lifting a sail.

At this point, the wall is up, but then there's moving it if needed, bracing, removing the lifting masts, adding adhesive where the walls meet, check for vertical and then, finally nail it.

It takes a while, but once its up its ready for siding, so we're doing lots of "prep" for the finish stage now, so the time invested is well worth it. The more we can do while the walls are laying down, the more effiecient we can be.

The mornings are chilly, but its hot during the day.

Here's some pictures:


More walls tomorrow.

Monday, August 31, 2009

One Wall to Rule Them All

This is the framing plan that shows what pieces go where, and what size.

Here's the wall being framed. If you look you can see the arrangement of studs that match the drawing in the photo above.

Here's the wall with the zip system sheathing installed and the seams taped (the black lines).

Joe is attaching furring strips every 1 foot on center. This gives the exterior a sort of pinstripe look.

This is the wall standing up. Its effortless with the wall jacks.

Today Joe and I spent a lot of the day working out our wall building system sequence and procedure. Typically, building a wall is pretty straightforward; you lay out the framing, square it up, sheath it in plywood and stand it up.

Our process is similar, but we are using a sheathing called Zip system and the primary thing about it that it has the vapor barrier built into it. Most folks have seen houses being built that at some point are wrapped in Tyvec or Typar or some other similar product. We don't need to do this because the wrap is already a part of the plywood. All we need to do is tape the joints between the plywood and its good to go.

After framing the wall, we attach the rubber sill gasket to the bottom of the wall, attach the wall it's self to the floor with some thin metal strap to keep it from sliding when we go to lift it, caulk our perimeter openings against air infiltration, and then sheath the wall with the Zip system plywood.

After the sheathing and taping happens, we strap the wall with 1/2" furring strips running vertically every 12" on center to create a rainscreen, which is an air space behind the clapboard siding that will be installed in a few weeks. The strips allow air circulation which keeps moisture from gathering behind the clapboards, which in turn lets the painted surface remain intact while the boards stay dry and last longer. Before attaching the strips, we need to layout where all the trim will go in order to know where attachement points are needed.

Once the furring strips are in place, we are ready to raise the wall into
place. Thanks to Joe's thoughtfulness, we are equiped with wall jacks which make raising the walls a matter of cranking a couple of wiches. The wall jacks are essentially masts that have a steel cable runing up and over them with a hook on one end and the winch on the other.

It took us a while to get ourselves to the standing wall, but that's okay because we were basically doing a test run for the rest of the walls, which we'll be continuing on throughout the week.