Sunday, July 5, 2020

10 Year Check-In


Charlie excavating on either side of the bulkhead

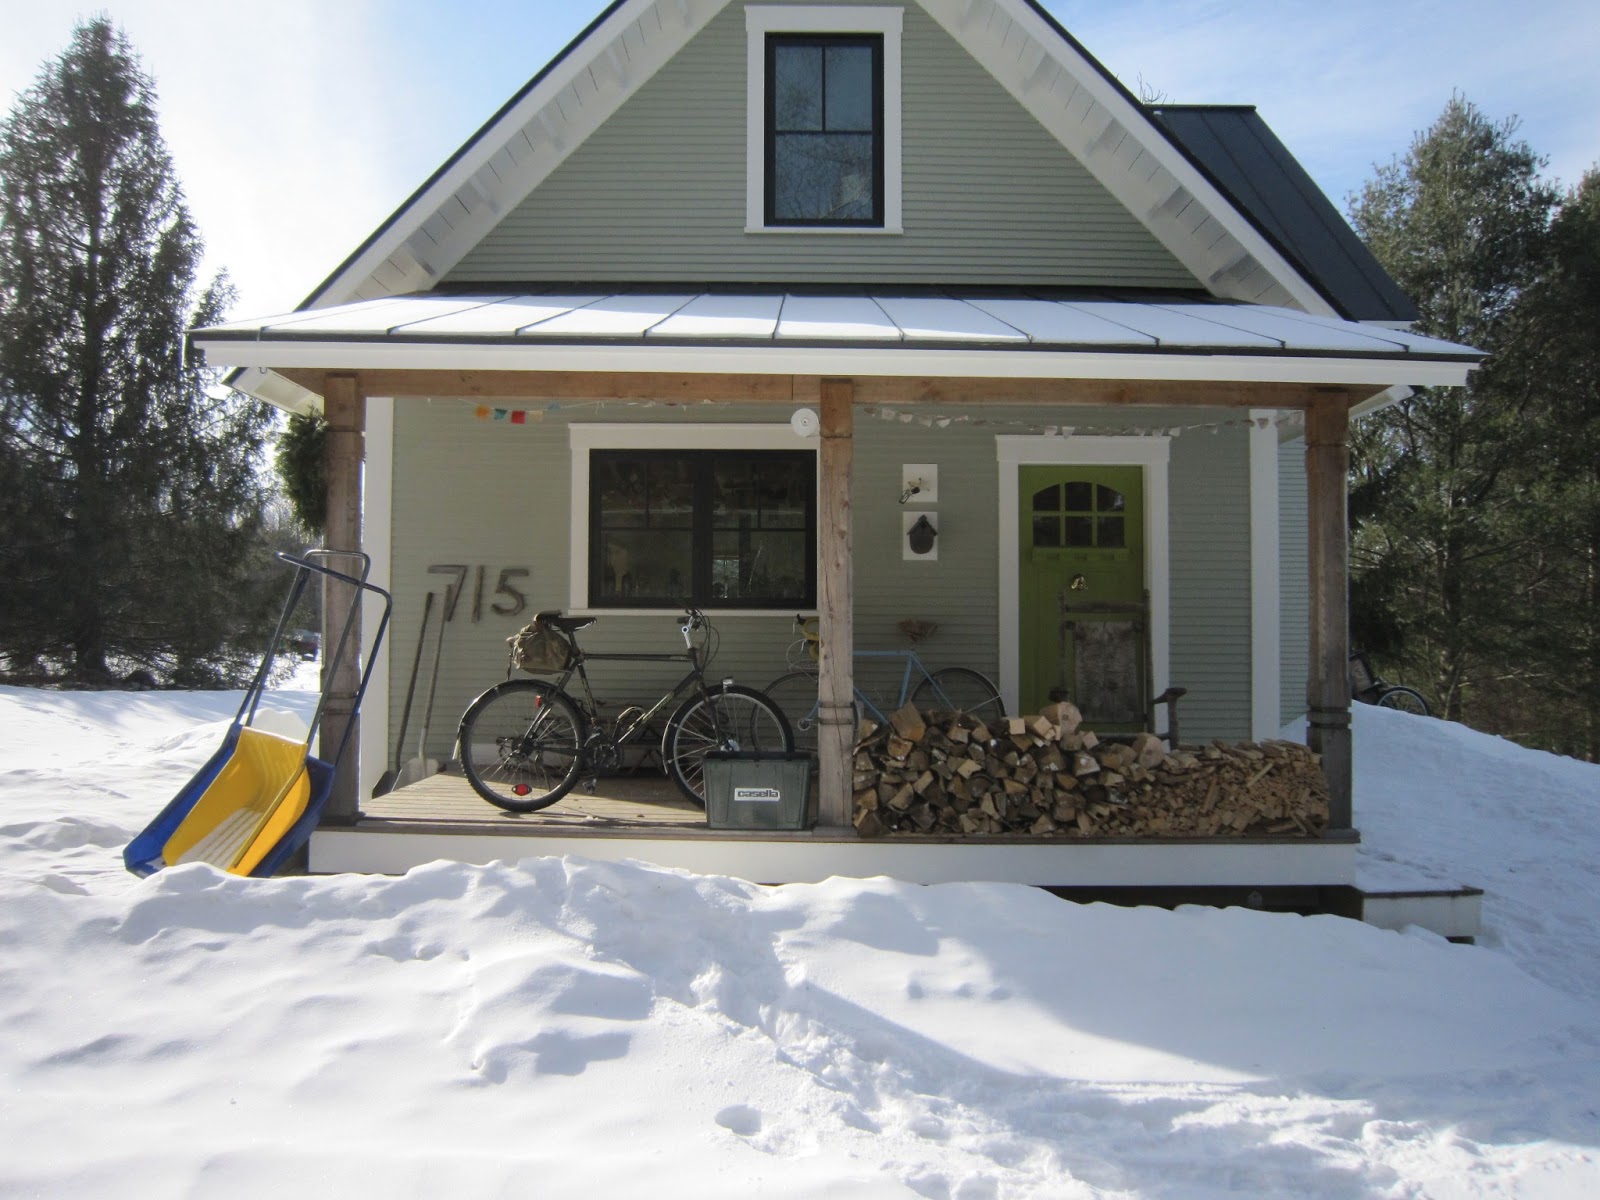
We have a semi-vauge sense of when we "built the house" or "finished the house" because parts of the process lingered on for a good while--I'm thinking the exterior painting which feels like the last significant project to happen. Anyhow, it's been more or less 10 years since the house was under way and that's a nice excuse to check in.

I still think of the house as new, but in fact its gone through that first blush of newness and there are a few bumps and scratches here and there, nothing really big, but the usual wear that comes with use. 

One actual problem that's been on the list to deal with for a while is the retaining walls on either side of the bulkhead in the rear of the house. Joe and I built these early in the building process and I'm not sure what plan or experience we were working from, but within a few years of being built, the walls started to curl in towards the bulkhead. Whatever retaining system we schemed up really didn't work and it's been kind of an ugly mess for the last bunch of years. The prospect of excavating the old walls and deadmen was daunting enough that I kept putting it off until this summer when we finally bit the bullet. 

We hired our neighbor Charlie to come over and take care of a list of small excavation projects that we'd been wanting to do for a while. 
-Some settling had occurred in the back of the house along the foundation and water was pooling against it 
-The flow of rainwater on our property directed water straight into our garden, so we had some major swaleing done to redirect the water around the garden. When the original site work was done we still had the yurt right next to the garden, so it wasn't possible to do any work in this area 
-Our driveway was in need of a refresh
-We wanted to relocate our sugar shack/garden shed. 

This Spring has been unusually dry and the timing lined up for the work to happen, so we hustled to get ready before Charlie arrived, moving perimter drainage stone, pulling away the old retaining walls, getting the shed clear for moving, etc...

The first two layers of structure. I built, filled, packed and then repeated until the walls were completed
.
Charlie dug out the old walls and I was surprised at how little there was supposedly holding the walls in place against the frost. I then spent the next week or so building a super-robust double wall retaining structure out of PT lumber. It was a lot of heavy work but I'm confident it'll do it's job well for a long time to come. 

Nearly done


In the photo above you can see how the earth has been carved out to the left and in front of the garden. Water used to enter at the corner and now flows in the valley made by the swale.

Along with regrading the earth against the back of the house we took the opportunity to clean and reinstall the french drain system. Dirt and debris tend to settle in the stone over time and a little maintenance goes a long way. The whole back of the house drains well and looks sharp and functions well now. Its very satisfying to see the water in a rain storm go AROUND the garden, rather than through it, and it's been great to have some extra fill to level out spots around the property. 

This is where we had pooling against the foundation. We pulled off all the crushed stone, filled, packed and graded the soil to flow away from the house and then rebuilt and reinstalled the perimeter stone drainage. Its so much better now!


Monday, October 21, 2019

Let the Sunshine in!

Wow. Its been FIVE years since the last House blog post! I suppose there have been few changes that have quite risen to the level of blog-worthiness, but that's not really true. In 2016 we were lucky enough to get a solar electric system installed on the house.


Through a long chain of events we found ourselves committing to a solar electric system. I always figured we'd invest in solar hot water first, since that is our single largest utility cost, but when we were presented with the metrics and cost of having a grid-tied solar system installed we decided we liked the prospect and decided to go for it. That's not to say we won't augment our propane/hot water costs at some point, but we've taken the solar electric plunge.
Having built the house I'm always a bit proud to account everything that I, or Joe and I, did ourselves. The exceptions being the earthwork, the concrete, the sheetrock, much of the electric, and significant parts of the plumbing/hot water stuff. Well, I can add "solar" to the list. The crew from SunCommon did a great job and I did virtually nothing other then confer on a few decisions as needed. On one hand it goes against my nature to have others do things I could do myself, while on the other its super nice to see the work done efficiently and professionally, so I'm not complaining.


The funny thing about suddenly having a grid-tied solar home is that PRESTO! nothing is noticeably different. The change comes over time as we recoup our investment and eventually see our electric costs subside to as-needed maintenance, and that's proved to be the case. We have a negative balance on our electric utility bill--just what we were expecting. All concerns about clearing off the snow or worrying about cloudy days are forgotten. The system is sized to generate a positive flow over the course of the year and it has been successful. The joke around our place now is "only use the lights during the day!" since that is when we are sending our extra power back to the grid and not purchasing it from the utility.


Our home was always envisioned as a net-zero design, and installing this system is a major step in that direction. It feels good to both invest in long term savings and know that we are disinvesting from dirtier forms of power consumption. We're grateful to have this opportunity.

Thursday, December 5, 2013

Hood Hook Up

The completed project. We're liking the effect of the lowered hood

Long on our list of things to do to complete the house is hooking up our kitchen vent hood. I've dragged my feet on doing this for a couple of reasons: First, I always picture the vent duct as a big hole in our house where all sorts of energy loss will occur. Secondly, not having the hood hooked up has not seemed to cause much trouble in terms of either air quality or residual cooking build-up.

The opening through the wall

I mentioned this during a presentation I recently made to the Super Insulation class at Yestermorrow Design/Build School.  It was suggested by John, one of the instructors, that I really should complete this project because it has notable effects on home air quality. Just because I'm not aware of it doesn't mean its not there.

This shows the hood before I lowered it. The duct connections are partially in place

The hood with the ducting complete and the hood lowered

Feeling nudged in a way I needed to be, I spent the next day completing the hook up. This was straightforward since I'd installed the main parts during the construction of the house. The remaining work was completing the duct connection from the wall to the hood itself. Taking this on became an opportunity to lower the hood about ten inches to better capture the cooking smoke, steam, and particulate. When we first were putting the kitchen together I was concerned that the hood would look awkward suspended down in front of the window, so I hung it at the level of the top casing and it has sat there since, acting primarily as a light source for cooking.

The duct vent on the outside of the house. Its neatly tucked away, so you really need to look for it to see it. 
Time will tell if its going to create residue on the outside of the house

To our satisfaction, lowering the hood has had the nice effect of making things cozier in the cooking area. It creates a lowered ceiling and doesn't detract from the overall feel or the view out the window.

The hood is still a little higher than it should be, so I will work on it some more sometime soon, but for the moment I am glad to have the whole thing operating. We've been using it whenever we cook and I find myself suddenly sensitive to the potential harm of particulates in the air.

Incidentally, the hood came equipped with incandescent bulbs and this has always bugged me. I've wondered if I could replace the bulbs with fluorescents but never got around to checking. To my satisfaction I found it was super easy. I was a little uncertain because the bulbs have candelabra screw bases and I'd never had reason to see if they make fluorescents with them. They do, so it's no big deal. The switch is made.

The hood light with new fluorescent on the left and the stock lamp on the right 

Nance and I also discussed creating a housing to enclose the duct work, so we may make that happen too. I don't mind the metal tube look, but I think I'd enjoy a wooden enclosure as well.

Sunday, December 1, 2013

Numbers


I recently gave a presentation to the Super Insulation class at Yestermorrow Design/Build School about building and living in our house. This presented a convenient opportunity for me to take stock of the building process, consider our experience living in the house so far, and to put together some performance numbers. We've been in the house just under two years and have established a track record for firewood consumption and are starting to get some reliable numbers on our propane and electric costs.

When our home was completed Efficiency Vermont (the state energy conservation organization) tested and evaluated our house for energy performance and determined a HERS number, which was presented as a part of their evaluation. HERS stands for Home Energy Rating System and is the standard methodology for comparing performance across buildings and regions. Many factors go into the rating system, including air-tightness, window performance, efficiency of the appliances, lighting and heating systems, as well as design specs like insulation R-Values and so on. The rating is adjusted for climatic conditions in a given location.

This is a generic chart showing the HERS rating scale. The "This Home 65" has nothing to do with our home.

In the above chart, 100 equals the energy use of a new home built to conventional standards in 2006. This is used as a base line by which to evaluate the spectrum of performance across buildings.  A rating of zero means the house requires no energy at all, while a rating over 100 means the house is sub-par in relation to current norms.

Our home earned a HERS rating of 38, which is a "5 star +" in the star rating shown below.  The scale somewhat curiously goes from 1-5 stars and then has a + category.  (Maybe they needed to add a new category as more efficient homes are being built -- I don't know.)


The HERS rating laid out estimated energy use predictions for our home as follows (calculated in 2011):  
             26.6 MMBtu heat  $990
             10.1 MMBtu hot water  $375
             17.9 MMBtu lights & appliances  $704
             HERS estimated annual energy cost:   $2,188

Based on our actual usage, these are our costs:
           $100-$150/yr firewood
           $750 propane hot water/cooking
           $768 electric

           Our actual annual energy cost:   $1,668

In the nearly two years we've been living in the house, we have only heated by wood. There is the radiant system in place should we ever choose to use it, but for now we like heating by wood; it's easy and feels good.

Although we know from experience that our heating expenses are tiny, it is useful to see them laid out together with the other home energy requirements. We plumbed the house in preparation for installing a solar hot water system, and seeing these numbers is a good motivator for costing out the completion of that project. It would feel good to bring the hot water energy numbers down. 

Sunday, February 3, 2013

Wood Update


 Our stack in November 

Where we were a week or so ago

We did a little wood calculating recently.

Back in November we loaded up 42% of a cord onto the porch, calculated in cubic inches. I remember thinking at the time that we should have loaded up an even 50% so that we'd know where we were once we'd burned through it. In any event, I took a picture back then and just now went back and recalculated based on what we stacked. The calculation from the photo matched my memory of what we figured back then: to get up to a full 50% would mean moving 13 cubic feet of wood (which is easy for us because all our wood it cut to 12") from our long term storage over to the porch. We did this today and here is the remaining portion of a half-cord stacked on the porch.

February 3rd

We won't know for a another good month or so where we'll end up, but it is looking like we'll burn somewhere between one-half and three-quarters of a cord, which would make sense. Last year we burned just about a half cord for the season, but it was a reasonably mild winter.

Sunday, November 25, 2012

The stone walkway

Loading the cart

Unloading. Why the cycling jacket? Its hunting season.

Waiting to be placed in the ground

During construction of the house, we put aside a really nice big flat stone. Sometime this summer I got around to setting it in the walk as the first in a series that will become a stone walkway to the driveway. The stone is lovely and it is a really nice first "step" on this little project.

Nancy and I frequently take a walk through the most beautiful wooded area that happens to just be out our back door. It has dramatic rises and falls, an impressive brook running through it and portions of gentle wooded paths. Part of this walk is on my parents land and over time we've noticed a few choice stones that would make welcome additions to our evolving stone pathway. The challenge is that these heavy stones are out in the middle of the woods and how would we get them back up here to the house?

Luckily we have the most amazing hand cart built to plans created by David Tresemer. We are fortunate that the rocks were located uphill from an access way that we were able to back a truck into. I easily walked the cart down through the woods to the stones and then Nancy and I were able to muscle them into the cart and roll them down to the truck. More effort got them into the truck bed and they are now laying on the ground waiting to be laid in the pathway.

Saturday, November 24, 2012

Stair Railing, Pt. 2

I started off wanting to install a railing down the stairs from the second floor to the first, but was delayed slightly by needing to rebuild a section of upstairs railing before I could start to piece together the actual stair rail. With that now complete, I spent some time crafting the railing.

First off I needed to pencil  the height of the completed rail on the wall and then mount the handrail brakets that the railing will sit on when installed. We purchased some nice vintage reproduction brackets from Lee Valley.

One of the rail brackets. I find them really beautiful, but as is the lot of a rail bracket, it is mostly hidden from view behind the railing itself

With the brackets installed I then built up the rail pieces themselves. I had planned to continue the railing detail around the opening on the second floor down, but Nancy said it was way too big.  I then  sized the whole assembly down and it is much better now--easier to grasp and a gentler profile all around.

The junction of the two runs of rail where they meet at the landing


This is where the (newly extended) section of stair opening railing meets the rail that goes downstairs. I'm still not sure how these two are going to connect

The intersections where the railing sections meet are the challenging part since they are coming in at an angle and then making a turn or (in the case where the upstairs railing meets the stair rail) turning, dropping, and then turning again.  I knew the only way I'd be able to work this out was to build everything long and then make fitting decisions where I could actually see the relationships.

That is the next step: work out the connections between the two runs of rail and then sort out how I want to finish it where it enters out into the living room on the first floor. Should it be simple and unadorned and just end at the opening? End in a decorative curl atop a post? Hmm... I enjoy visualizing this kind of thing.

Wednesday, November 21, 2012

Stair Railing


Nice morning light coming in on the section of upstairs railing I'm rebuilding

Its become apparent to me that we need a railing for the stairway between the first and second floors. Any time kids or older folks are visiting I notice the subtle search for support as someone goes up or down the stairs. We are plannng to have a full house here at the end of the year with both young and old alike, so I'm working to get a railing in place beforehand.

This is a somewhat complex project for a couple of reasons. Railings often look simple because they seem to seamlessly wind down the stairway passage, but in fact there are sometimes odd drops and levels that require some creative woodworking and joinery.

The newly rebuilt section of railing that now extends about 6 or 7 inches further along the stair opening. The circle indicates where the post used to be


Additionally, joining the rail to the existing banister that runs along the stair opening on the second floor has required rebuilding a section of the upstairs banister. I resisted making this effort at first since it meant doing some careful deconstruction, but once I committed myself to going that direction it became clear that the project will be much more satisfactory in the end.

As you can see in the photo above, the original banister did not quite reach to the end of the stair opening, as indicated by the light colored circle where the post used to be. I considered various ways that I might extend the existing structure, but in the end decided that the best way to "stretch it" was to rebuild the whole section.  A really nice bonus to result from making this decision was the opportunity to do a better job positioning the vertical wooden posts that sit in groups of three along the span of the railing. When I built the section the first time I didn't really work out a satisfying positioning between the two metal posts and now I have the opportunity to correct that. You may not be able to see it too well in the photo below, but each grouping of three wooden posts now sit nicely centered in the run. It used to be off kilter and it bugged me.

New section of upstairs railing in place with newly positioned vertical posts


With the section of railing rebuilt and extended, now I can get on with my original goal to instal the railing down to the first floor.

Wednesday, June 20, 2012

Solstice paint


I've continued work towards completing our second coat of paint and am nearing the end. Once I reach the end of the wall under the lower roof on the right I will be done.

Tomorrow is the solstice and I thought it would be fun to (nearly) capture that moment when the sun is at it's highest, casting it's near complete shadow over the sun pattern on our south wall.

Monday, March 12, 2012

Spring


This warm weather is presenting an opportunity to finish the painting work that I didn't quite get to finish last fall. It is basically the portion of the wall under the lower roof over the kitchen.

Friday, March 9, 2012

The Desk

The new desk

The storage cabinet closed. Inside is the printer, modem and power strip

The inside of the storage cabinet

Note the arrangement for holding the various cables in place under the desktop. They are easily disengaged if need be.

Detail from one of the cabinet side panels

The office desk is nearly done. We are waiting on a little more hardware and there are a couple of tweaks here and there, but the big stuff is done and in place. I used cherry wood throughout.

You might recall from a previous post that Nancy and I came up with the design by creating a mock-up to test out the arrangement. From there I translated that into a plan for two cabinet bases, a large desk top and a "wing" that slots into the desk and provides good work space and views for Nance, who spends lots of time working at this desk. She's managed with some pretty rudimentary set-ups in the past, so its nice to create something that sets her up well.

The right hand cabinet is a conventional set of drawers; the top one is a simple drawer and the bottom one is a file cabinet sized arrangement.

The left hand cabinet looks like a matching cabinet with drawers but in fact serves as storage for the printer, the power strip, and the modem. The side of the cabinet opens to reveal the stuff inside but doesn't look like a door.

The wing is designed to easily come off so that we can have space to set up a bed in the office when we want to make it into a guest room.

When I was working out the plan, Nancy challenged me to come up with something clever for sides of the cabinets and I was sort of stumped. After tossing around some ideas I decided to stamp the side panels with letters and numbers--the idea being that desks, cabinets, printers and the like are pretty much about generating and holding letters and numbers. The result is subtle, but I'm pleased with how it came out.

A bonus is the keyboard drawer which I picked up the at the state of Vermont salvage store in Waterbury. It is versatile, easy to use, and very solid; a new version of this mechanism would cost over $100. It was a good catch at $10.

When the drawer slides arrive I will build a slide out base for the printer so it'll be easy to load up paper. The drawer pulls will be in that same order and installing those will round off this part of the project. Yet to come are an upper shelving unit along the back of the desk for storage and such. That'll be easy compared to the desk and cabinets.

Monday, March 5, 2012

Wood Use Check-In


This week we are just finishing up burning a total of 1/2 cord of wood so far this season.

(Since our wood is all cut to 12" long, it is easy to quantify the volume of wood we stack between the posts on the porch. I have a mark at the height of a quarter cord and can easily mark the heights for fractions of that quarter cord.)

Last night Nancy and I discussed how much more we should load onto the porch. I suggested another quarter cord, or maybe an eighth. We settled on a sixteenth.

With the strong sunshine at this time of the year along with warming temps it just doesn't seem like we'll burn too much more wood.

Now that we are beginning to understand our heating requirements the information allows us to consider how we might source our wood needs. In the years we lived in the yurt we needed so much wood (about 3.5 cords per season) that cutting it ourselves was not really a consideration. Harvesting a half cord just doesn't seem so hard so its interesting to think about harvesting our own wood supply from the surrounding woods.

Wednesday, February 8, 2012

Joe's Step

The step with hinges in place. They hold the step and keep it from slamming down unexpectedly

The hinges and directions

Before the hinges went in

Joe's step

When we were building the step down from the main bedroom on the second floor to the guest room, Joe came up with the idea of making the step an openable storage space and it seemed like a great idea.

Ever since it was built I've cringed when kids are playing around up there because the step is a very long and heavy piece of wood and I've been worried that fingers could easily be hurt if the step were flipped down while a hand was underneath.

I recently solved this issue by installing a couple of resistive hinges that keep the step from swinging freely. You need to actively swing the step down to close it and it cannot close unexpectedly.

Meanwhile I'm in the midst of building the desk project I wrote about recently. Hopefully I'll have phase one (the desk cabinets) done soon and can start to put it all together.

Monday, January 30, 2012

Office Desk

Nancy at work. I was concerned the L would impede the passageway to the basement stairs, but its fine

The view outside is important and this arrangement works really well. Our bird feeder is outside the window on the right allowing for an easy glance over the computer

Sketches of the desk. We'll store the printer under the desk in a faux cabinet


We've been working on making the office space functional. For many months the computer has been set up on a little 3' x 3' table and we decided we needed to design a desk that would work well in the room.

This is Nancy's primary work space and she has a few priorities that we've been considering for a long time but never really figured out satisfactorily. Going way back to our original house plans we knew we didn't really know how we were going to make the space work, but we just figured we'd figure it out.

Nancy's priorities:
-View: In the yurt, she could glance just to her right and see the birds on the quince bush.
-Not having the desk run in front of the window(s)
-Proper storage and being able to spread out her work as needed

Beyond these requirements we want the room to still be useable as a secondary guest room when needed.

I spent some time playing with different arrangements and didn't really come up with anything satisfactory. As we looked at my sketches, Nancy suggested having the desk extend in an L out into the middle of the room. For me this seemed like putting a big hook in the way of the flow walking from the upstairs to the basement (something I do multiple times a day), but we decided to mock it up and to our satisfaction found that it met all our requirements. Nancy's been working on the mock-up since. Meanwhile I've been planing out the real thing and am just starting on building the desk now.

Our plan is for the wing of the desk that extends out into the room to be easily removeable. This will open up the floor space for a futon should we need to set up the room for sleeping.

Saturday, January 14, 2012

Wood Use


Later on January 14, 2012...our second 1/4 cord stacked


January 14, 2012...the last of our first 1/4 cord


January 1, 2012...roughly an 1/8 cord


September 24, 2011...our first 1/4 cord

Its been fascinating to monitor our wood consumption this fall and winter.

By New Years Day we'd used just over an 1/8th of a cord which you can see in the middle photo above. Now, two weeks later we've used most of what was left. This means it's taken about three and half month's to go through a 1/4 of a cord to heat a 17oo sq. ft house.

Of course it has been a mild fall, so this may not be indicative of future use, but it starts to lay out a pattern for us to plan around. January and February are the coldest months of the year and it will be interesting to see how much wood these months require. It seems like a reasonable guess that we won't go through more than a cord total for the year, but we'll see when all's said and done.

(I've spent some time trying to figure out a way to present energy use in comparable terms and I'm not there yet, but I want to work it out so it can be presented in a way that would allow comparisons with other forms of fuel, house size, and energy efficiency.)

In dollar terms we paid $200/cord in July for the wood we have on hand now. Roughly this translates to about $50 to heat our home so far this heating season.

The quarter cord we are just finishing burning is a couple years old, so its delivering more btus/kwhs then the woodstack we are about to start using which has not had time to fully season. The new wood was (presumably) cut and split in the middle of the summer since we had it delivered at the end of July. After this season it will be easy for us to maintain a seasoned wood supply by having one dry cord to burn and stocking up a green cord each summer.

Saturday, November 19, 2011

Second Coat


Before...
... and after

Over the last couple of months I've been slowly working away at giving the house a second and final coat of paint (technically stain, but seems like paint in practical terms) and I'm rounding the corner literally and figuratively on the project.

In September I decided to start at the porch and then work around the back of the house, figuring that I'd cover the cooler parts of the house while it was still warm and then be painting the sunnier sides as the fall progresses. This has turned out to be a wise tactic as we are now in late November and all that's left is part of the south-facing wall.

Progress has been in fits and starts. Hurricane Irene was the first unexpected event that redirected much of our time and attention to helping others over the course of a couple of weeks. Then came teaching an intense two-week course at Yestermorrow, followed last but not least, by a brief stay in the hospital resulting from a cat bite.

Nonetheless, I've been making progress as time and weather have allowed and in this respect, I think we've been quite lucky. The stain requires 40 degrees or above for application, so I've been able to work with very few exceptions right up through the fall.

Our original plan --which we are working to complete-- was to have all the clapboard primed by the factory, then apply a first coat of primer before the clapboard was installed, and then finishing up with a final coat when the siding was in place. Although the house has generally looked finished for a good while now, much of the rafter tails hadn't even been primed, much less painted, and all the nail holes and clapboard butt-joints were rough.

It feels good to know that we're seeing this part of the project through to insure the quality and durability of the siding.